


My pie crust recipe is the same one my mother taught me to use when I was in high school.

To make the pie crust you need:
1 cup flour
1/2 tsp. salt
1/3 cup shortening
about 2 tbsp. water

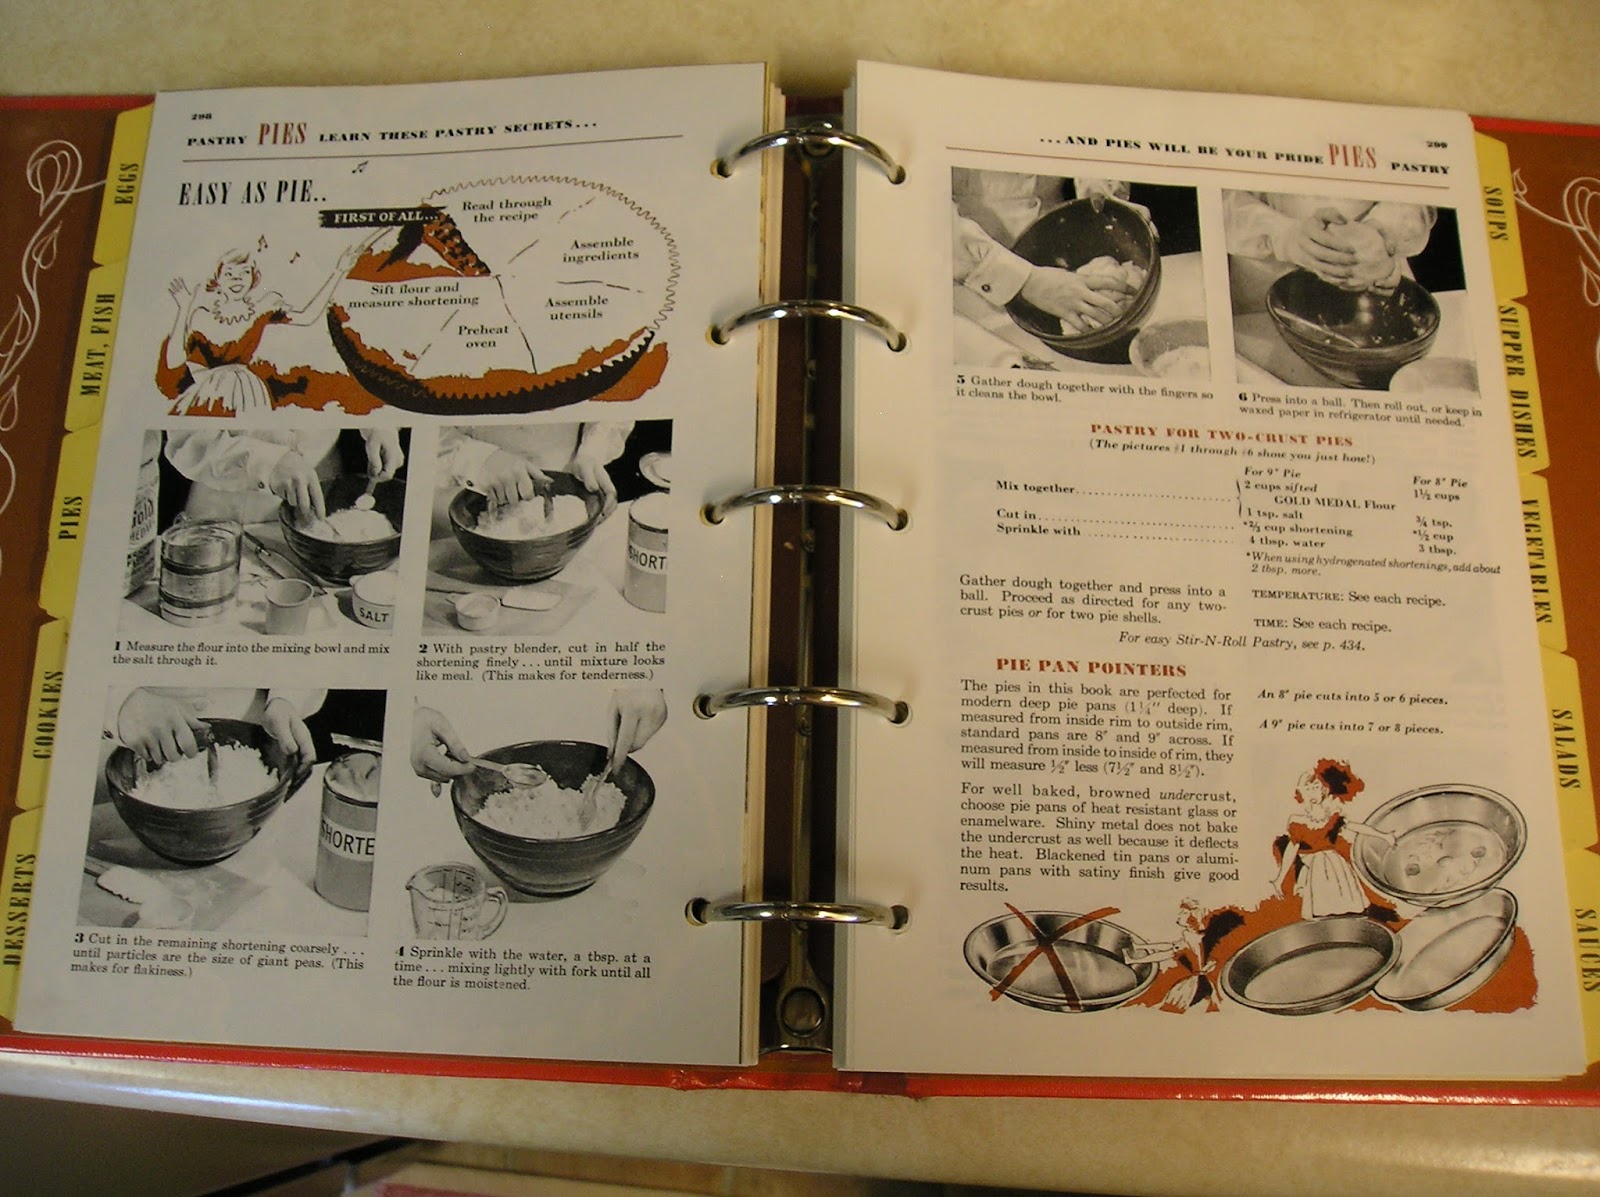
First, dust 2 pieces of wax paper (about the size of your pie plate) with flour.


Mix the salt with the flour, then cut in the shortening with a pastry blender until it is consistent and crumbly.

Sprinkle in a tablespoon of water at a time and stir with a fork until a ball forms. Use as little water as possible for a flakier crust.


Put the ball of dough between the two pieces of waxed paper and flatten. Roll the dough out with a rolling pin a little larger than your pie plate. I have had this rolling pin for about 30 years. Frank made it in a woodshop class he taught. It was originally going to have handles like most traditional rolling pins, but never quite got that far. I am glad. I really like it just the way it is. I have tried one of the others and I don't think they work near as well. Maybe I am just a little biased, but for me, it is perfect.


Slowly peel the top layer of waxed paper off. Don't be surprised if the dough wants to stick to the paper somewhat. Just gently get it started all across one side and peel back slowly.


Turn the dough over with the waxed paper side up and center it on the pie plate. Now repeat the same process of peeling off the final piece of waxed paper. Let the crust settle into the pie plate as you go.


When my mom taught me how to make pie crust, the hardest part was learning to flute the edges, but I finally got it down. It isn't necessary, but it does make the pie look pretty. First, I tuck under the extra dough to give it an extra layer to flute. Then, squeeze the dough up between your fingers to form the scalloped looking edge.


Boy! I sure know how to dirty up a kitchen! Frank spent his time between taking pictures and washing dishes.

The pie filling is very easy. If you have fresh squash, peel it, take the seeds out and cut it in cubes. Boil it until it is soft enough to mash easily with a potato masher. Measure out 2 1/2 cups and you are in business for making a pie.

Grace and her husband have tried this pie and she says it is very similar to pumpkin pie. Frank and I don't care for traditional pumpkin pie, so I am not familiar with the ingredients. One of the things I like about this pie is the amount of our homegrown ingredients that go into it.

The recipe calls for 1/4 cup of cream, so I took out a couple of jars of milk and skimmed off some fresh cream.

I don't make our pies very sweet. I use 2/3 cup of brown sugar as the sweetener.

Add:
3 eggs
Melt and add
2 tbsp. butter

1/2 cup milk
1/2 tsp. salt
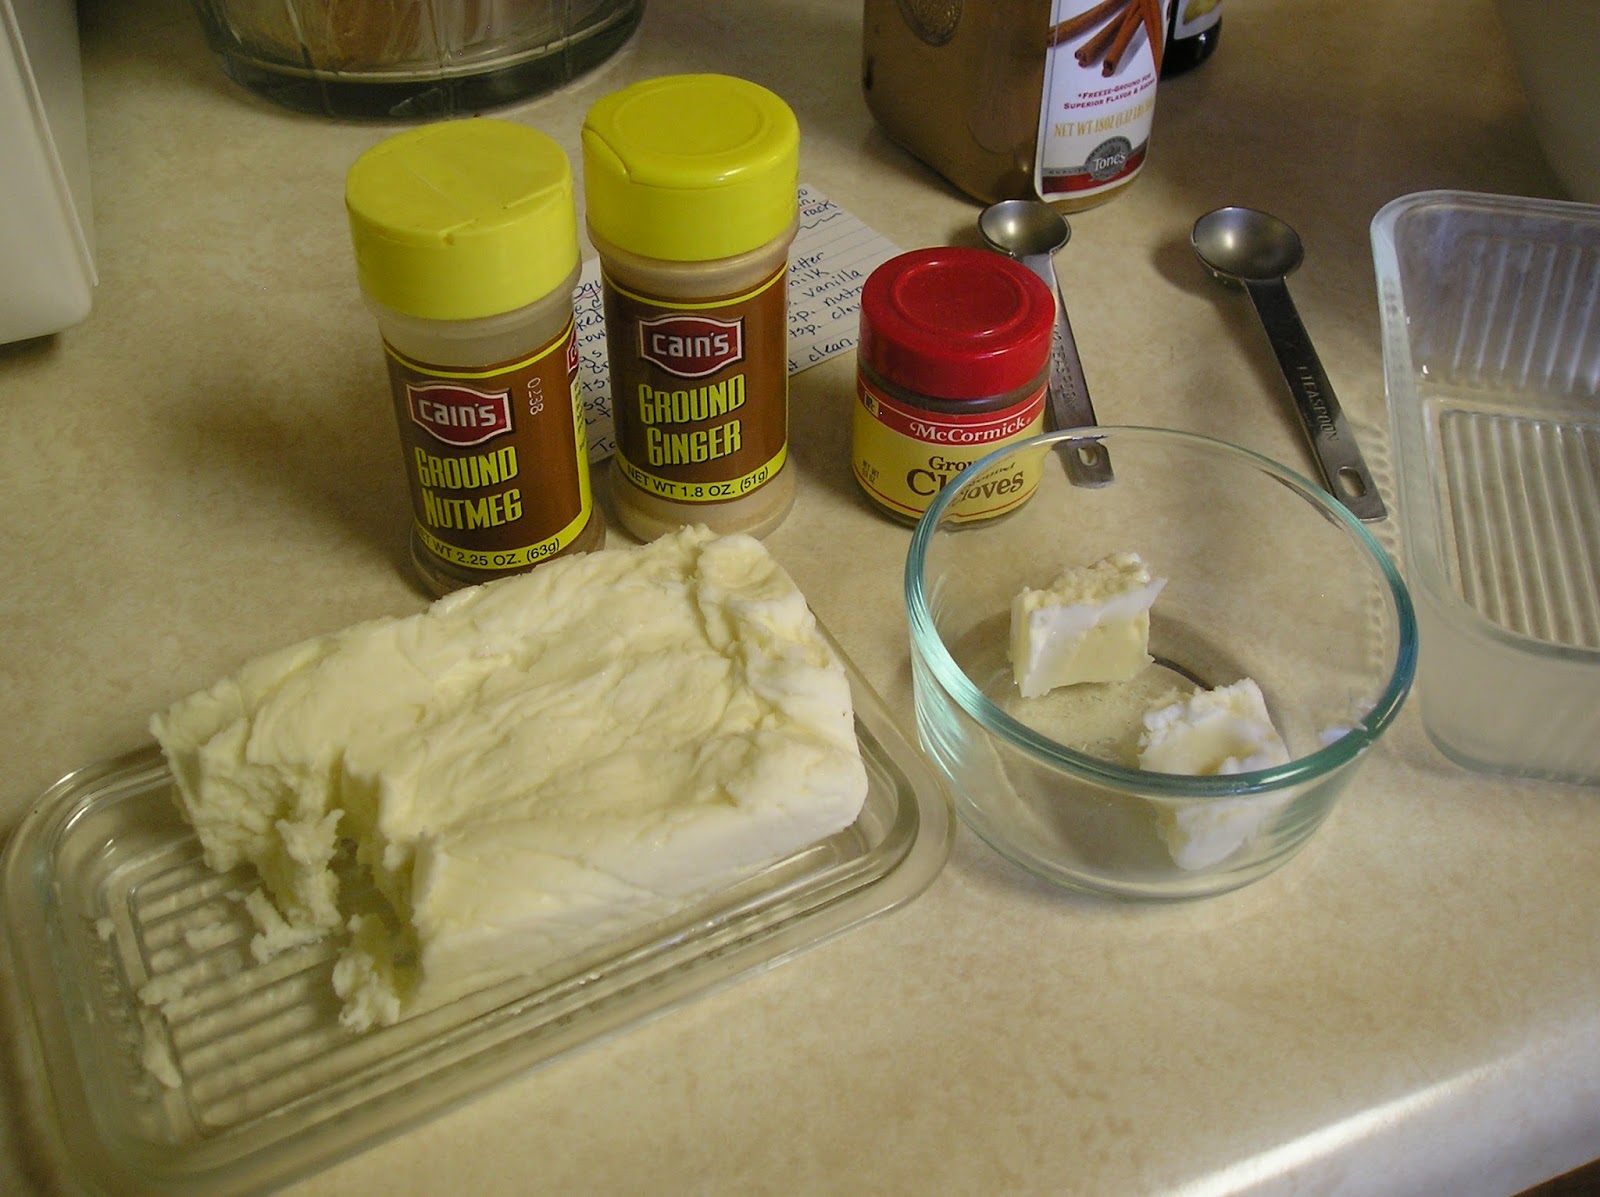
1 tsp. cinnamon
1/2 tsp. ginger
1/2 tsp. nutmeg
1/4 tsp. cloves
1 tsp. vanilla

I made one of these once thinking I had mixed it up well. When I went to serve it I thought I had not mashed the squash up well enough when I found a lump. It was a cooked egg yolk! Make sure you mix your ingredients well.


These Lodge trivets were a great find. We use them frequently when we are canning. Now it awaits the pie.

Frank was going to test the pie with his finger. I told him I wouldn't recommend that.

This is what our Winter Squash Pie looks like when you serve it up before it is completely cooled. It kind of oozes onto the plate but tastes great!

From the looks of our winter squash crop this summer, we hope to enjoy more pies in the months to come. This is another easy recipe with many homegrown ingredients that we really enjoy.
Until next time - Fern
I printed the recipes I wanted to keep in a format that I could cut out and tape to a rolodex card. The rolodex holder sat on top of the refrigerator for 20 years or so.
ReplyDeleteHandy that way.
That's a good idea.
DeleteFern
Who can wait for a pie to cool before testing it out?!? It always oozes, right? We've never grown winter squash, just summer squash and zucchini...maybe one day. I love your typed recipes. I have some in all conditions. I even have some in my Grandma's squiggly cursive on very aged/yellow notebook paper. Thanks for sharing with us at The HomeAcre Hop!
ReplyDeletePlease join us again Thursday at:
http://summersacres.blogspot.com/2013/10/the-homeacre-hop-40.html
~Ann
We didn't have room for Cushaw this year but a very nice young farmer at our farmers market had some beauties! He was quite frustrated by his customers wanting to buy them for Halloween Decorations no to eat. How sad is that? I made up some recipe cards for Cushaw pie so he could hand them out when he sells a cushaw. He had not thought of that but it should get people thinking. I also make baked cushaw with brown sugar and a crunchy apple oatmeal topping, sort of a cushaw cobbler casserole. Your recipe and photo's are awesome! Do you have any recipes for Pink banana Squash?
ReplyDeletemy paternal grandmother used to bake pumpkin, butternut & cushaw pies. she even taught herself how to make them in the microwave crustless. when i first asked for her recipe she said she didn't measure--she just threw stuff together. but thankfully the next time she kind of measured so she could give me a recipe. now these weren't the traditional pies like with pumpkin pie spices. she used only lemon flavoring in them. these were my favorite pies and the only kind of pumpkin pie i ever eat.
ReplyDeleteJulie, these are usually the best recipes. And besides, it is something from 'home' and family. You just can't beat that.
DeleteThank you for sharing!
Fern