The Road Home

The Road Home
There is no place like home.
Showing posts with label storage. Show all posts

Monday, November 30, 2015

Good Advice from the Plant Lady

We recently published an article titled Got Food? For How Long? and received some very thought provoking comments from the PlantLady. She is an experienced gardener and provides us some very good advice. We'd thank her for taking the time to share her experiences and we would like to share what she had to say.
~~~~~~~~~~~~~~~~~~~~~~~~~~~~~~~~~~~~~~~~~~~~~~~~~~~~~~~~
This very subject is why I became a market gardener. Not to make money - although that is very nice - but to practice growing large quantities of food. Have always been a serious gardener (ok, maybe obsessed), but more on the ornamental side as I had always hoped to have a small nursery after retirement. With the way things are now, food is far more important. And
while I am the person the master gardeners call with questions (hence the PlantLady moniker), had no idea of just how much to grow, how many seeds it would take, which crops would provide the most nutrition, which crops to grow when for a balanced diet, timing of planting and harvesting, which crops store easily without refrigeration or canning and just how big the garden needed to be. During my 6 years of elder care, studied everything I could get my hands on to try to figure all this out. Guess what? There is no way to know without actually doing it! Every location is so different as far as weather, general climate, water availability, soil structure and fertility and available resources...and all these factors change constantly. What worked last week, month or year may be totally wrong for the now.

So two years ago worked up new ground and started practicing. Last year I started selling at market. This year I doubled the size of the garden and sold at market regularly, added a second location for selling closer to home and started really keeping track of what I grew when, how much I harvested, how much I sold, how much I donated, how much I preserved, etc. Keeping records is necessary...you may think that you will remember, but
there is just too much you need
 to know. And, heaven forbid, after the Darker Ages arrive...what if something happens to you - the only person that knows everything needed to produce enough food? Your family will be oh so grateful to have a written record of how much of each crop is needed, how many seeds to plant to get that much, when each crop needs to be planted and harvested, how to time things so you have a steady supply for fresh eating, how to time things so crops for preserving ripen at the best times (ie. for making pickles, you need cukes, dill, onions, garlic, peppers and apple cider vinegar simultaneously) how to best preserve each crop, how to save seeds and breed crops to best suit your location, provide the largest harvest, resist disease and insects and suit your taste.

Then there are the infrastructure needs...do you really want to be starting a garden by digging sod by with a stick? No way - that needs to be done now with power tools. And you need to stock up on good quality shovels, hoes, rakes, wheel hoes, GLOVES - enough for many people. Do you want to wake up one morning and find your only food for the next year has been decimated by

deer/rabbits/coons/strangers? Heaven forbid - get fencing now while its available and learn how to set sturdy fence. While things are still available, plant as much perennial food as you can - fruit trees and berry bushes, nut trees, asparagus, rhubarb, horseradish, etc. And stock seeds...I get twitchy if I have less than 5 years worth on hand. Also get animals while you can, unless you plan on being a vegan in the coming Darker Ages! Not just for needed food, but also for their manure to keep your garden fertile. Green manuring is ok for the now, but how are you going to cut, chop and incorporate those easily by hand? Easier by far to turn under composted manure and bedding. Get what you need to extend the seasons so you can grow more food - cold frames, hoophouses, low tunnels. 

The only real way to know what you actually need is to do it. What are you waiting for? You can do it...start now!


PlantLady 


~~~~~~~~~~~~~~~~~~~~~~~~~~~~~~~~~~~~~~~~~~~~~~~~~~~~~~~~

PlantLady - continued

I am an excellent gardener, but am just starting on trying to figure out just how much food I need to produce to feed my extended family and how I am going to manage this feat with just what we have here in the way of natural resources, equipment and plant and animal stock. Trying to get a sustainable cycle set up before conditions get too much worse, because once the trucks stop running, it will be very hard to impossible to get anything.
 

There is a lot more to it than you might think, especially when your very lives will depend upon your success. When what you eat is what you grow, you find that you don't plant a garden once and harvest it once. You will be constantly planting and constantly
harvesting - because of course you will be wanting to constantly eat (hehe). People I talk to are amazed that I don't "put in" the entire garden Memorial Day weekend then harvest as it ripens. There are spring, summer, fall and winter crops possible - even here in the far north. I plant stuff most every month except Oct., Nov. and Dec. and we and the goats and chickens eat out of the winter salad garden under low hoops all fall, winter and spring. And I never plant a crop just once or all in the same location...I plant some for early cropping then wait a while and plant more for midseason, then wait a while and plant some for late. Aside from extending the harvest period, your entire crop of something isn't vulnerable all at the same time in the same place. Plus, that way you don't have a years worth of a crop all at once to preserve - you can spread the work out over a few weeks or months. Johnnys Selected Seeds website has some awesome planting charts for each seasons crops and succession planting - an invaluable resource.

And folks, first you gotta have land with water that will grow food, or you don't have much of a chance to survive the coming Darker Ages. Nobody wants to hear this or think about it - but its true. Every time I read about someone planning on surviving by growing enough food on a city lot or in pots here and there, I want to cry - because that just isn't going to work. Once the trucks stop running, its up to you to feed your family. And to grow enough food you need land. If you don't have land, if you are real lucky, you might get taken on by someone with land and the infrastructure to grow food as a slave, serf or the like - just for the chance to be fed anything. If you aren't lucky, you and your family will starve without the means to produce the food you need.

The upside is that growing your own food now is about the smartest thing you can do, even right now, with prices for everything rising so quickly. Every bite of food you can produce is one you don't have to buy. And infinitely better, safer and fresher than anything you can buy anywhere. A lot of what we learn on our prepping journeys is very useful and perhaps critical to know "at some point". But am I going to drag out the book "When There Is No Dentist" now? No, I will go to a dentist while I can. But growing your own food is great even in the "now"...saves money, you get a better product and you can afford to store more. Plus, you will be gaining the knowledge, equipment and stock you will need to survive the coming hard times.

Let's all go plant something edible!


PlantLady


~~~~~~~~~~~~~~~~~~~~~~~~~~~~~~~~~~~~~~~~~~~~~~~~~~~~~~~~

There are a couple of things PlantLady brought up that I'd like to comment on. So far I have begun a notebook with maps of my garden from year to year for adequate crop rotation. I also have a notes on what I planted. What I don't have is information about when and how much I planted, or how much I harvested, all of which is vital information if we plan to truly live off of what we grow. This is one of the points PlantLady discussed that really hit home with me.

Planting in succession for a steady harvest is another thing I have not done. I have always just 'planted' the garden. Now that we have the greenhouse up and running, I have given much more thought to planting crops more than once. This will be the beginning of my learning experience in this realm. 

We have given much thought to alternative ways of storing food such as canning, drying, curing and cool storage, as in a cellar. All of these skills are still in their infancy for us, but we have begun this process.

Saving seeds? I have done a very poor job of this. For me, it is always easier to order seeds. How will that help me at TEOTWAWKI? Obviously it won't and I need to get very serious about having my own seeds to plant instead of someone else's.


I can't agree more about preparing your ground now, if you have some. Turning a garden with shovel instead of a tractor or tiller is backbreaking work, not to mention new ground is not very fertile and will grow a limited amount of food until it has been worked and enriched.


Why am I pointing out our short comings in gardening and raising our own food? Because we are all in this together and can learn so much from each other. I find PlantLady's comments very, very encouraging. They are also inspiring me to learn more and do better. Please share your ideas, experiences and thoughts with all of us so we can learn even more.


I know the opening lines of Got Food? For How Long? were rather harsh. A friend of mine said she opened the article expecting a nice Thanksgiving thought, not me saying get with it or you will starve. Hard? Yes. True? Unfortunately, very true. The incredibly, unbelievable events taking place all over the world on a daily basis make learning every possible survival skill of the utmost importance. Please heed PlantLady's advice and start growing something edible today. Yes, in December. Somehow, somewhere in your house, on your porch, somewhere, start growing something edible today.

Until next time - Fern

Monday, August 17, 2015

A Simple Non-Electric Milking Machine

The time has arrived that I need to employ a milking machine instead of continuing to hand milk our goats. This time has arrived much sooner than I had hoped, but the arthritis in my hands have made that decision for me. I have a finger that will no longer straighten unless I work on it for a while. It is affecting my grip and I'm dropping a lot of things. Rats. One of the biggest draw backs for me is that I really enjoy milking my goats. I'm sure I still will, it will just be different. I can enjoy the still of the morning, watching the animals and listening to the birds, it will just be different. As the goats and I get used to this new routine, I'm sure there will be challenges and adjustments along the way, so later on, I'll do an update on my new milking routine and tell you what I've learned. For now, here is my very first experience with this machine.


I can't say our milking machine is new because I bought it several years ago. It's been in a storage building awaiting the time that I needed it. This is an example of storing things that will become useful in the times to come. If you have a future project that will make life easier and more productive after the SHTF, and you can afford it now, acquire what you think you will need now and store it away. It will wait for you, just like this milker.

Back when I researched and looked for a simple milking machine the Henry Milker out of Alaska was the only one I found, so I got one. Now there are several companies that have similar products like the one Patrice Lewis at Rural Revolution uses, the Udderly EZ Milker. Patrice did an article on how she uses one to milk her cow here.  If there is anyone out there that uses or has experience with a non-electric milking machine, please share with us. I would really appreciate anything you can share. I wrote this part of the article before we went to the barn and tried out the machine. You'll realize why I said this later on.


The components of our milking kit included the vacuum pump, four tubes, two tube cleaning brushes, two wide mouth quart jars, two lids, a micro fiber cloth and a carrying case. The directions are simple and easy to follow.


Copper with her kids back in March
Copper, our three year old doe, was the victim for the first trial of milking with this machine. This is the second year we have milked Copper and she is very easy going and a good milker. She looked at me a few times as I fumbled around trying to get the bucket, which we brought to protect and support the jar, and the syringe that goes over the teat in place to begin this process.


At first I couldn't get a good suction going so the pressure would build up a vacuum and begin withdrawing the milk. With Frank's help, we finally got things going and the milk flowing.


Yes, we always have our radios, even when we're together.


The pressure gauge has to be pumped much more often than I expected, and even though I had to squeeze it less often than if I had milked by hand, it really wasn't that different than milking by hand except I didn't have to squeeze as hard.


I had to restart the suction/vacuum process twice on each teat because the milk stopped flowing. The directions included this possibility, and directed to release the syringe from the teat and start over, which we did.


Even with restarting twice on each teat, we only withdrew about half of Copper's milk. The rest I ended up milking out by hand into the bucket. I'm glad Frank recommended we bring it.


I'm sure with practice this machine would withdraw more of the milk, and I would be get much more adept. Even with all of the commotion of trying to figure out this machine, Copper was very cooperative through it all, and I was grateful. Frank did end up feeding her quite a bit more than usual just to keep her occupied while I tried the milker and he took the pictures. Even the flash on the camera didn't bother her. She did a very good job.

The Henry Milker worked just as advertised. The instructions and videos found on their website were helpful since I did run into a few things that were mentioned. Because I had access to the information ahead of time, I knew what to do when these situations occurred.
No filtering necessary
Pros? The milk goes directly into the jar which prevents any hair or dust from getting into it like it does when you hand milk into a bucket. The milk doesn't have to be filtered. Just change out the lid for a regular plastic one and put the jar in a bucket of water to chill, then into the refrigerator it goes. Even inexperienced people could milk an animal using this machine.

Cons? I have read in other places and heard from an acquaintance that you still need to finish the milking by hand if you want to
Copper's udder
make sure you get all of the milk and keep production to a maximum. The thing I noticed as we were increasing the pressure to create the vacuum and get the milk to flow, was that Copper's teat was pulled down and lengthened in the syringe. My first thought was that I didn't like that. What will that do to the tissue of her teat if this process is repeated over and over twice a day? Will it cause the teats to lengthen and stay that way? Will it cause them to loosen and lose their natural elasticity and break down the structure of the orifice? Will it cause them to leak over time because the tissues have been stretched so often?


One Stripe's udder
I don't even know if these are questions that address a valid concern, but my first thought was I don't want that to happen to my does' udders. I have grown very particular about the udders my does have and we have bred them to have certain characteristics. Another thing that has caused this concern is a video about another company that makes non-electric goat milking machines that shows the process compared to an electric milking machine. Some of the does in this video have very large teats and the suctioning motion of the electric milking machine rhythmically pulls on the teats. I think this process over time has caused part of the shaping of the teats. I don't see how it can keep from it. There are also some people that prefer a large bulbous type of teat, even for hand milking, because you get more milk per squeeze, therefore you don't have to squeeze as many times to get the same amount of milk as a doe with smaller teats. Maybe I am just backward in my choice of goat teats, but I don't think so. I think the straight, smaller structure of this type of teat is much closer to what is found in nature as opposed to what is found with structured breeding practices.

So, what about my arthritis? I don't know. But for now I will continue milking by hand and doing the best I can. I may need to limit how many goats I have in milk at once, I don't know. It is very interesting to finally get to a place where I thought I would have to give in and quit milking by hand even though I didn't want to. Now that I have tried it, I really don't want to use a machine, not unless I really, really, really have to, and for now I don't have to, so I'm not. I thought about just deleting this article and not finishing it, but then again I thought maybe it would be of use to someone, so here it is. Food for thought.

Until next time - Fern

Saturday, July 11, 2015

A Peach of a Day

We made a dent in the four bushels of peaches we picked up yesterday from a local orchard. It's been a long, productive day.

First, I sorted the peaches into three categories. The first one, which we took care of today, I thought of as the 'can right now' batch. These are the ones that were bruised, very ripe or injured in some way. The second group includes peaches that are ripe and ready to eat. Their skins are intact, and they are not bruised, but they need to be processed very soon, like tomorrow. The third group has those peaches that are still firm and can wait a few days before they need attention.

I decided to blanch and skin all of the peaches that we were going to process today in the first step. That frees up the stove for heating water for lids and rings, more water to sterilize the jars, and more water for the peaches in the jars. We used only water with pectin for our liquid, with no sweeteners of any kind. After the peaches were blanched and peeled it was time to heat up two water bath canners, slice the peaches, bring in more jars, dig out the pectin and get ready to go.

It always seems like that first canner takes forever to come to boiling. We heated up the water in the canner while we got everything ready, but it still takes a while to come to a rolling boil so you can start timing it.


We ran out of room on our 'sealing and cooling' shelf, so we had to wash up and put away the things we canned recently.


 I remarked to Frank that it is nice to finally be comfortable canning. At first I was always nervous, checking and rechecking to make sure everything was right. Now, I find it enjoyable to be able to confidently put away food for us to eat. 

The sun has long since set and we had a very late supper. We ended up with 34 quarts of peaches today and that's only about a third of them. We'll be at it for a few more days before we are finished, and then I have about 35 pounds of Cushaw squash waiting to be canned. It's been another good day on the homestead.

Until next time - Fern
 

Wednesday, October 29, 2014

Have You Ever Used Gamma Seal Lids?

Frank and I have long bought things in bulk. We discovered shortly after we were married and began teaching school that we could buy green beans by the case at Sam's Club for less per can than buying them separately at the grocery store or even Wal-Mart. Frank assured me when we got married that I would never have to worry about money, and he was right. He has kept that promise for over 30 years now. We've always joked that he is one of those men that could get blood out of a turnip.


So, what does that have to do with Gamma Seal Lids? Well, prior to going back to Alaska in 2000, we had many dry goods stored in #10 cans. It worked great, but it took up a lot of room, and necessitated a lot of
packaging - the cans, a plastic lid to use after can was opened, boxes to organize the cans and make them easier to stack. We had seen many items stored in six gallon buckets with mylar liners and regular bucket lids, but that type of purchasing was out of our price range. We just weren't willing to pay that much extra for the contents of the bucket. The only thing we stored in buckets at that time was wheat. We had some five gallon buckets of wheat with standard snap down lids.

When we returned from Alaska the summer of 2008, we quickly started stocking up our food storage. We knew the markets were on shaky ground and the housing market was quickly sliding into collapse territory. The need to have as many things on hand in case of a catastrophic collapse was very great. Within a few months of our arrival, we were able to accumulate a decent amount of food that could hold us over until we could, hopefully, produce more. By January we had chickens, goats and plenty of seeds for the new garden spot.

Somewhere along the way, we ran across some Gamma Seal lids. I don't remember where or why, but we did. We debated storing our dry goods like flour, wheat, beans, rice, etc., in #10 cans again, but the logistics and timing just didn't fit our current situation. We decided to try five gallon buckets with Gamma Seal lids. Our research indicated that plastic buckets with a food grade rating topped by a Gamma Seal lid should keep our food fresh and free from insects. Since we had not tried this technique before, we were a little skeptical at first. If you want to try something like this do your research, and make sure the buckets you use are food grade plastic.

Now, six and a half years later, I have absolutely no qualms about using this technique. At first we added a few oxygen packets to the buckets. But then we realized that after opening the buckets a few times to fill up our canisters, the oxygen packets would no longer be viable, so we quit using them. We still add a few bay leaves to each bucket of flour, rice or corn meal, but that is the only addition we make.

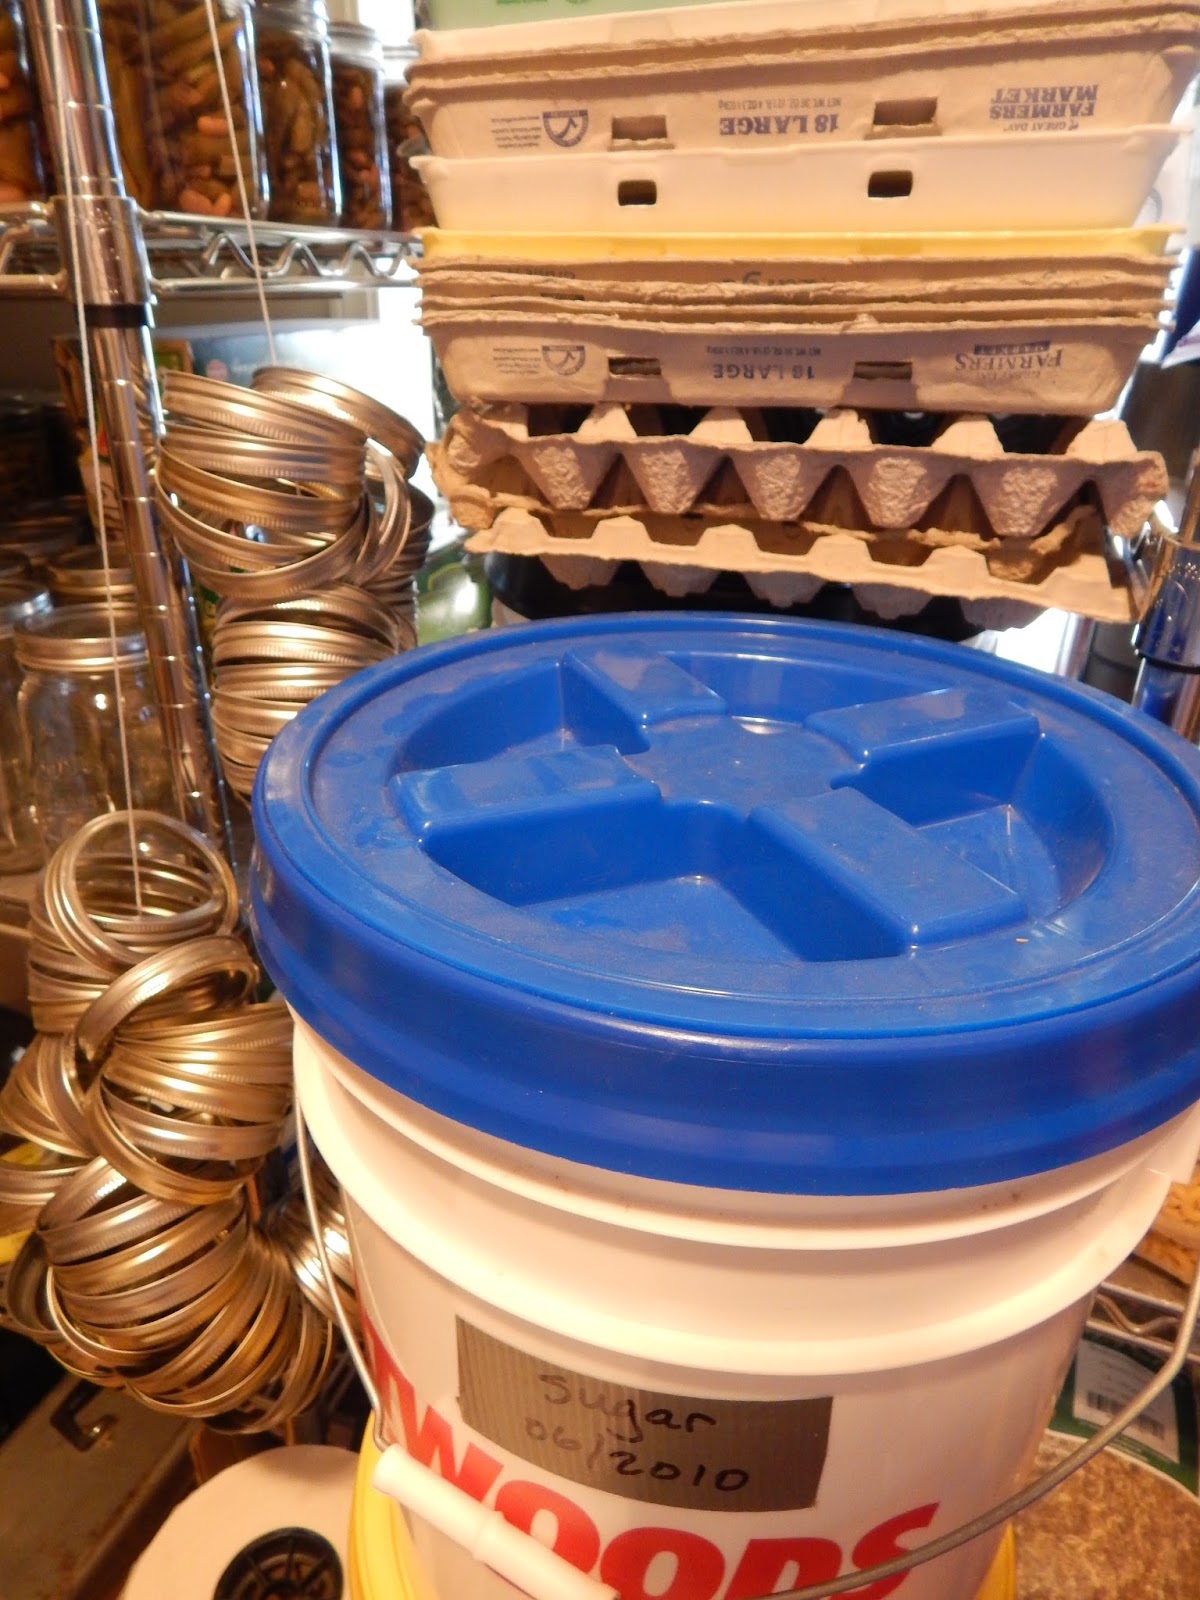
It is fairly easy to add a Gamma Seal to a bucket. First we wash everything well in soap and water, the bucket, the rim and the lid. It takes a while for all of the sections of the lid to dry completely before use. Then we attach the rim of the seal to the bucket using a towel and a hammer. If you are much younger and invincible, you may just be able to push down hard enough to snap these rings in place. We use a hammer. That's it, your buckets are ready to fill. We buy our buckets from Atwood's because they have the best price around. Every so often they put them on sale which is the best time to buy. We have friends that reuse buckets from bakeries or other places they have found them.

There is one little flaw we ran across, and it's not actually a flaw with the Gamma Seal lids. I'll do my best to explain this. When you stack one bucket on top of another with the Gamma Seal lids on top, it has a nice fit and it seats well. We stack them three or four high, and put the heavier items, like sugar, on the bottom. What we found is, if you tilt the three buckets on top of the bottom one forward, instead of the weight being equally distributed on the bottom bucket, then all of the weight of the top three buckets is focused in one small location causing the screw on lid to crack. This is not a fault of the Gamma Seal, it is operator error. Too much weight in one focal point, instead of being equally distributed. It took us a while to figure out what was happening. To alleviate this, just don't tilt the buckets forward, lift them straight up.

The best prices I have found for Gamma Seal lids are from the Ohio-Pierce Companies at freckleface.com. They have a number of ways you can buy. I usually get them by the dozen. One thing I have learned is to check and see if each rim has a gasket included. If not, Freckle Face will be happy to send a replacement. Just make sure you check them when they come in and not six months later, like I did one time, which was too late to get a free replacement. 

Also, food for thought. Once you put the rim on a bucket, we have not been able to figure out a way to get it off without destroying it. We use these lids on almost all of our buckets. And to identify the contents, we use duct tape. If you change the contents, change the duct tape. We put the contents and the date on the outside of the bucket and then stack them with the label out. These are little things we have learned from experience. Put the heavier stuff on the bottom, don't tilt the upper buckets forward, and put the labels where you can see them. This system works exceptionally well. We have yet to have any problem with any of our food stored this way. Some of it is in the house and some of it is out in the garage. Storing foods in an out building where temperatures fluctuate in the summer and winter does impact the longevity of the food. But sometimes you have to make due with the space you have. I figure it would be better to have the food and not need that much, than to not have it and need it.

Until next time - Fern

Wednesday, November 6, 2013

Corn Pancakes, Mmm-Mmm Good!

Frank had a brilliant idea this evening - Pancakes for supper! We don't have them very often, so they are a real treat. Our favorites are Corn Pancakes. I don't remember where I got this recipe. I have had it for a very long time.


The ingredients are fairly simple and it's a quick meal that is very filling and tastes great. It's excellent comfort food.


Gather your ingredients.


Put them in a bowl. Stir.


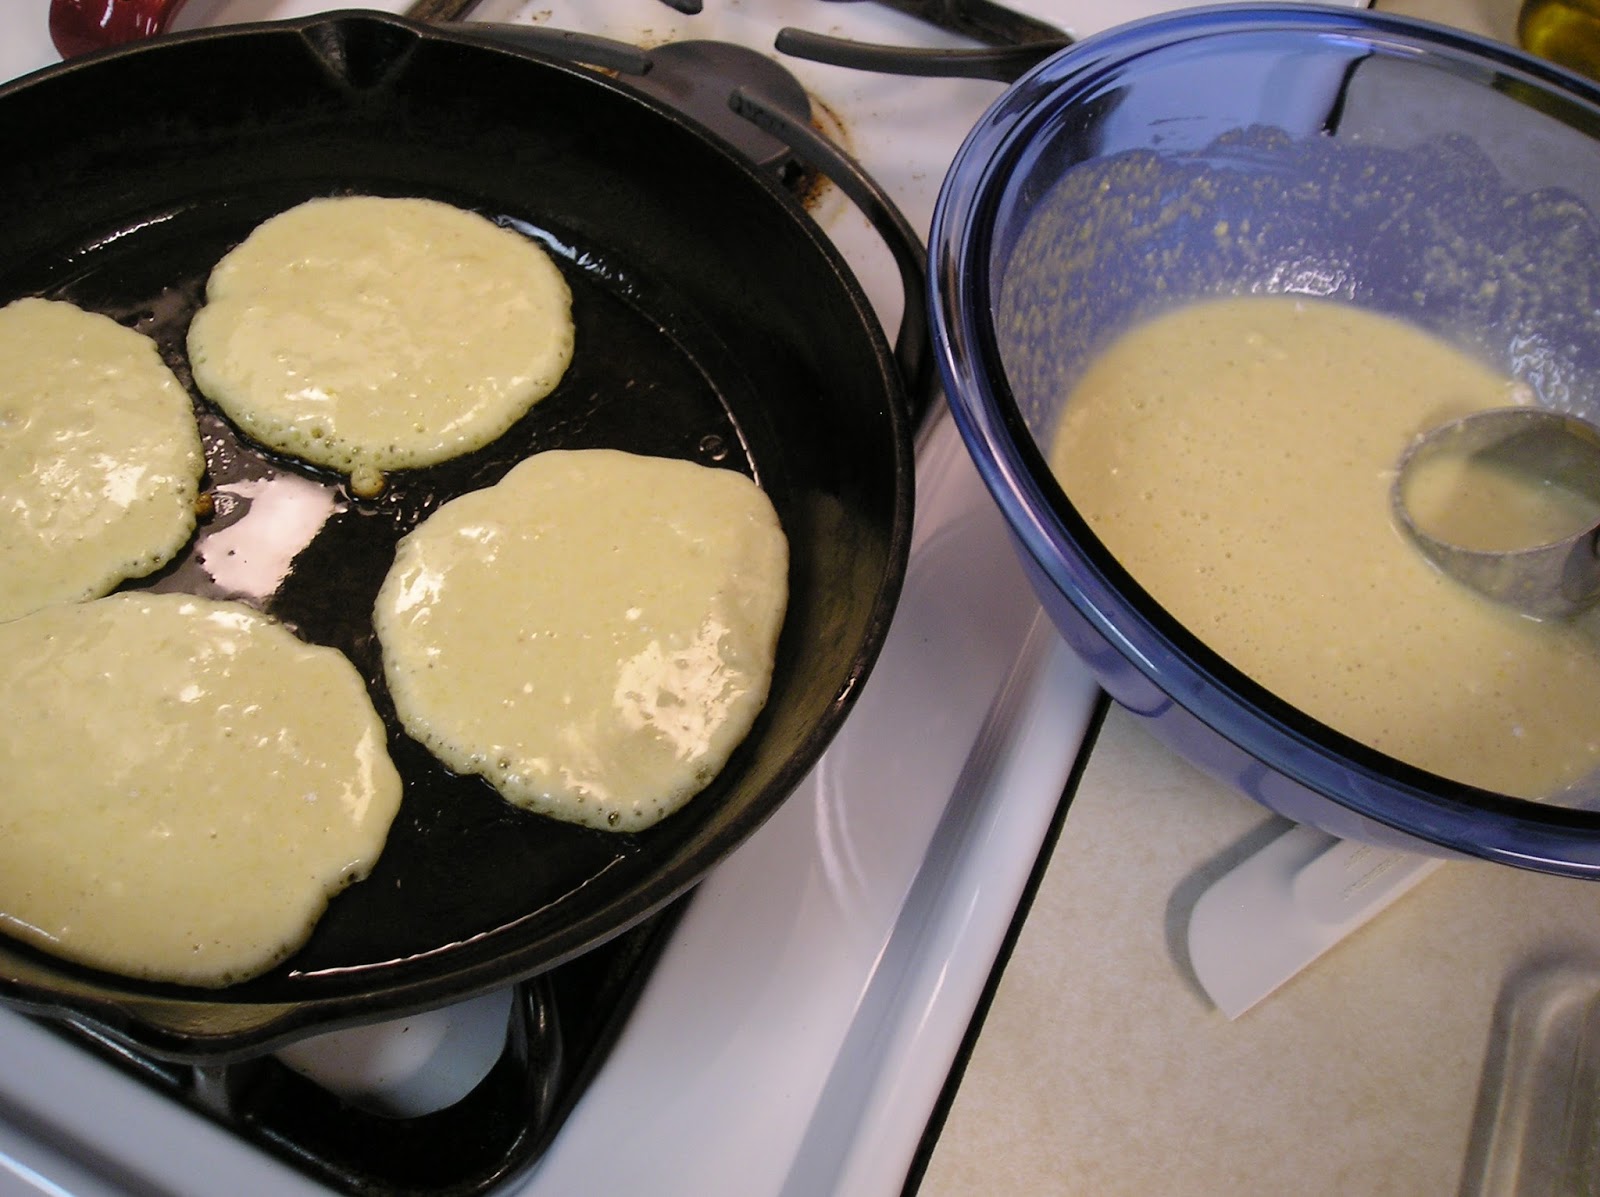
Cook. I dip the batter out with a 1/4 cup measuring cup. It makes a nice size cake. I use olive oil in the batter and to cook with. It is the only kind of oil we use.


I butter each pancake as they come out of the pan. Frank likes them that way, so I enjoy doing it just for him. That's one of those neat things wives can do for their husbands. I'm using store bought butter now
since we aren't getting much milk from one goat. It definitely makes a dent in the amount of cream we have to make butter. I like to cover the stacks with a flour sack towel to keep them warm as I cook. It works great.


We enjoy good ole' maple syrup with our pancakes.


There you have it. A quick, easy, yummy meal that is a treat to eat. As I make these types of recipes and meals, I think about the ingredients I am 
using. These are the things I need to store and have on
hand for the long term. What things do you need to add to your storage that will benefit your family if there is a grid down situation like the show 'American Blackout' that many people are talking about? What if the lights hadn't come back on? Then what? Take the time each day to ponder the needs of your family. Then get to work.

Until next time - Fern