I figured it was time for an update on our garden, especially since the weeds are giving the vegetables a run for their money. When it was too wet and rainy, I couldn't do much weeding. Now that it is hot, humid and dry, we are really busy with a number of projects, so I still have accomplished little weeding. I get a little done in the mornings when I go out to pick greens for the chickens, goats and pigs. That's about it for now. The last few days have been in the 90's with high humidity and intense sunshine. I know, I know, I really wanted some sunshine, and I'm glad we have it, but it sure has turned off hot rather quickly. Here are some pictures of our growing masterpiece, weeds and all.


Not only are the turnips not a hot weather spring plant, these are having to compete with a lot of grass. I pull as much grass as I pick turnip greens for the chickens in the mornings, but it is still starting to overtake the bed. These pictures were taken around 5:00pm, when the lighting wasn't the greatest. The wilting of these greens tells me it's time to water the garden. A week ago I never thought I would be saying those words.
 Collards, carrots and zinnias. I sprinkled the collards with diatomaceous earth a few days ago and I think it is helping with the slugs and worms.
 Frank made the perfect DE (diatomaceous earth) dispenser for me out of an old fiber canister. Works great!
We have about 20 volunteer potato plants in this area of the garden where we grew them last fall. Even though we are not eating potatoes right now because of the high carbohydrate content, we view these as our seed potatoes for future consumption on a limited basis.
If you look at the size of the blade of grass in this picture, you'll realize just how small this pepper plant is. Surprisingly, it is growing. There are a few more that survived the cats and the last flooding rainstorm. I need to plant more seeds and see if they will direct germinate in the garden.
The Buttercup winter squash hasn't taken off as quickly as I would like, and one hill rotted from the rain, but it is starting to vine out and produce. These are really good, sweet squash that are great keepers. They taste similar to a sweet potato.
Frank made the perfect DE (diatomaceous earth) dispenser for me out of an old fiber canister. Works great!
We have about 20 volunteer potato plants in this area of the garden where we grew them last fall. Even though we are not eating potatoes right now because of the high carbohydrate content, we view these as our seed potatoes for future consumption on a limited basis.
If you look at the size of the blade of grass in this picture, you'll realize just how small this pepper plant is. Surprisingly, it is growing. There are a few more that survived the cats and the last flooding rainstorm. I need to plant more seeds and see if they will direct germinate in the garden.
The Buttercup winter squash hasn't taken off as quickly as I would like, and one hill rotted from the rain, but it is starting to vine out and produce. These are really good, sweet squash that are great keepers. They taste similar to a sweet potato.
 The tomatoes are blooming and have been worked into the trellis on the right. They are healthy, sturdy plants that are growing vigorously. The Buttercup squash is on the left in this picture, with carrots beside the tomatoes on the trellis to the right.
We have lots of zinnias growing here and there throughout the garden.
This small trellis was supposed to have cucumbers growing on it. Instead, I must have planted some yellow squash seeds that we saved last year. The cucumbers I planted while it was still raining, are still in a tub on the porch. See the empty space on the right?
The tomatoes are blooming and have been worked into the trellis on the right. They are healthy, sturdy plants that are growing vigorously. The Buttercup squash is on the left in this picture, with carrots beside the tomatoes on the trellis to the right.
We have lots of zinnias growing here and there throughout the garden.
This small trellis was supposed to have cucumbers growing on it. Instead, I must have planted some yellow squash seeds that we saved last year. The cucumbers I planted while it was still raining, are still in a tub on the porch. See the empty space on the right?  That is where I planted the cucumber seeds I saved last year. Only three of them germinated. All of the plants on the left are from a packet of seeds I bought.
 The planned yellow squash patch is between the tomato and green bean trellises. The grass and weeds are especially happy here.
 Some of the squash is happy, and some are heat stressed and need watering. I applied diatomaceous earth to all of the squash mounds in an effort to impact the vine borer and squash bug populations. I planted nasturtiums around the squash hills this year, which are very pretty flowers, and supposed to be bug deterrents.

 The green beans are growing well and blooming, but the heat is getting to them as well. Some of the bottom leaves are yellow today. There are carrots growing down each side of this trellis, in spite of all of the grass and weeds. I've been able to clear out parts of the weeds, but there are still more than enough to pull in this area.
 The Cushaw winter squash grows very well here. It took off early despite all of the rain and is producing a number of young squash. It is hardy and healthy.
 The cowpeas have more than enough grass to keep it company. Some of the seeds I replanted made it and some of them didn't. There are supposed to be two rows of okra growing in between the cowpeas, but the rain either washed away the seeds, or they rotted. I will be replanting them next week.
I may be able to harvest a head or two of cabbage after all. They got a hefty dose of DE after it quit raining and since then I haven't seen much more damage. I'm tempted to harvest the largest head just to see if the worms and slugs are hiding out inside where I can't see them.
The cowpeas have more than enough grass to keep it company. Some of the seeds I replanted made it and some of them didn't. There are supposed to be two rows of okra growing in between the cowpeas, but the rain either washed away the seeds, or they rotted. I will be replanting them next week.
I may be able to harvest a head or two of cabbage after all. They got a hefty dose of DE after it quit raining and since then I haven't seen much more damage. I'm tempted to harvest the largest head just to see if the worms and slugs are hiding out inside where I can't see them.
 The Michilli cabbage has been disappointing. It didn't do anything besides grow loose leaves that were rather tough, then start bolting to bloom. I have used these as animal feed instead of human feed. Now I am pulling up the plants a few at a time and feeding them to the pigs. I will plant some cantaloupe or honeydew here.
The only thing that is planted in the new part of the garden for now are pinto beans on this trellis. As time allows I will till some of this area and plant sunflowers and cowpeas.
The Michilli cabbage has been disappointing. It didn't do anything besides grow loose leaves that were rather tough, then start bolting to bloom. I have used these as animal feed instead of human feed. Now I am pulling up the plants a few at a time and feeding them to the pigs. I will plant some cantaloupe or honeydew here.
The only thing that is planted in the new part of the garden for now are pinto beans on this trellis. As time allows I will till some of this area and plant sunflowers and cowpeas.
 There is enough spinach for salads, even with competition from the grass.
 The beets are doing well. There are some here and there in the cabbage patch as well as some back down by the collards and turnips. But there aren't enough, and I need to plant some more.
I attended my bug class today and learned a few interesting things I will share in another article. It was geared more towards habitats for pollinators than beneficial garden insects, so in that respect I was disappointed. But, on the other hand, I learned some useful things about beneficial insect habitat that I will be able to incorporate into our garden and landscape environment.
The beets are doing well. There are some here and there in the cabbage patch as well as some back down by the collards and turnips. But there aren't enough, and I need to plant some more.
I attended my bug class today and learned a few interesting things I will share in another article. It was geared more towards habitats for pollinators than beneficial garden insects, so in that respect I was disappointed. But, on the other hand, I learned some useful things about beneficial insect habitat that I will be able to incorporate into our garden and landscape environment.

It is 94* today with high humidity and little to no breeze. I hope this is not an indicator of how the rest of the summer will be. After having cool, rainy weather for so long, this quick onset of hot, summer weather has been difficult for gardens, animals and humans. I some ways it reminds me of how the events in the world, and particularly in our country, are heating up. If we're not all careful, vigilant and prepared, we could suffer heat exhaustion or have a heat related crisis, in more ways than one. Remember to protect yourself from the heat, meaning the temperature and the climate of your neighborhood, city, state and country. It could be a matter of survival.
Until next time - Fern
We had one more bag of frozen winter squash left from last year's harvest that we wanted to eat, so that means it is time for a pie. Even with the incredible heat and drought we had last summer, our Cushaw and Buttercup squash did pretty good at
the end of the season. We kept many of them in storage for much of the winter, then we peeled, boiled and froze several quarts. This is our last quart. Since we didn't really plan ahead before we decided it was a good day for pie, we thawed it out in a sink of hot water while I made the pie crust.
I searched online for a recipe specific to Cushaw squash and found several that were almost what I wanted, so I combined the best of the ingredients and came up with this recipe. It calls for a single pie crust.
My pie crust recipe is the same one my mother taught me to use when I was in high school.
In my spare time as a teenager living in the country, I decided to type (on a manual typewriter!) my favorite recipes in a booklet format so I would have my own cookbook when I left home. Well, my booklet never really materialized, but I am still using my typewritten pages with my old favorite recipes.
To make the pie crust you need:
1 cup flour
1/2 tsp. salt
1/3 cup shortening
about 2 tbsp. water
First, dust 2 pieces of wax paper (about the size of your pie plate) with flour.
 Mix the salt with the flour, then cut in the shortening with a pastry blender until it is consistent and crumbly.
Sprinkle in a tablespoon of water at a time and stir with a fork until a ball forms. Use as little water as possible for a flakier crust.
Mix the salt with the flour, then cut in the shortening with a pastry blender until it is consistent and crumbly.
Sprinkle in a tablespoon of water at a time and stir with a fork until a ball forms. Use as little water as possible for a flakier crust.
 Put the ball of dough between the two pieces of waxed paper and flatten. Roll the dough out with a rolling pin a little larger than your pie plate. I have had this rolling pin for about 30 years. Frank made it in a woodshop class he taught. It was originally going to have handles like most traditional rolling pins, but never quite got that far. I am glad. I really like it just the way it is. I have tried one of the others and I don't think they work near as well. Maybe I am just a little biased, but for me, it is perfect.
 Slowly peel the top layer of waxed paper off. Don't be
surprised if the dough wants to stick to the paper somewhat. Just
gently get it started all across one side and peel back slowly.
Slowly peel the top layer of waxed paper off. Don't be
surprised if the dough wants to stick to the paper somewhat. Just
gently get it started all across one side and peel back slowly.

 Turn the dough over with the waxed paper side up and center it on the pie plate. Now repeat the same process of peeling off the final piece of waxed paper. Let the crust settle into the pie plate as you go.


 When my mom taught me how to make pie crust, the hardest part was learning to flute the edges, but I finally got it down. It isn't necessary, but it does make the pie look pretty. First, I tuck under the extra dough to give it an extra layer to flute. Then, squeeze the dough up between your fingers to form the scalloped looking edge.


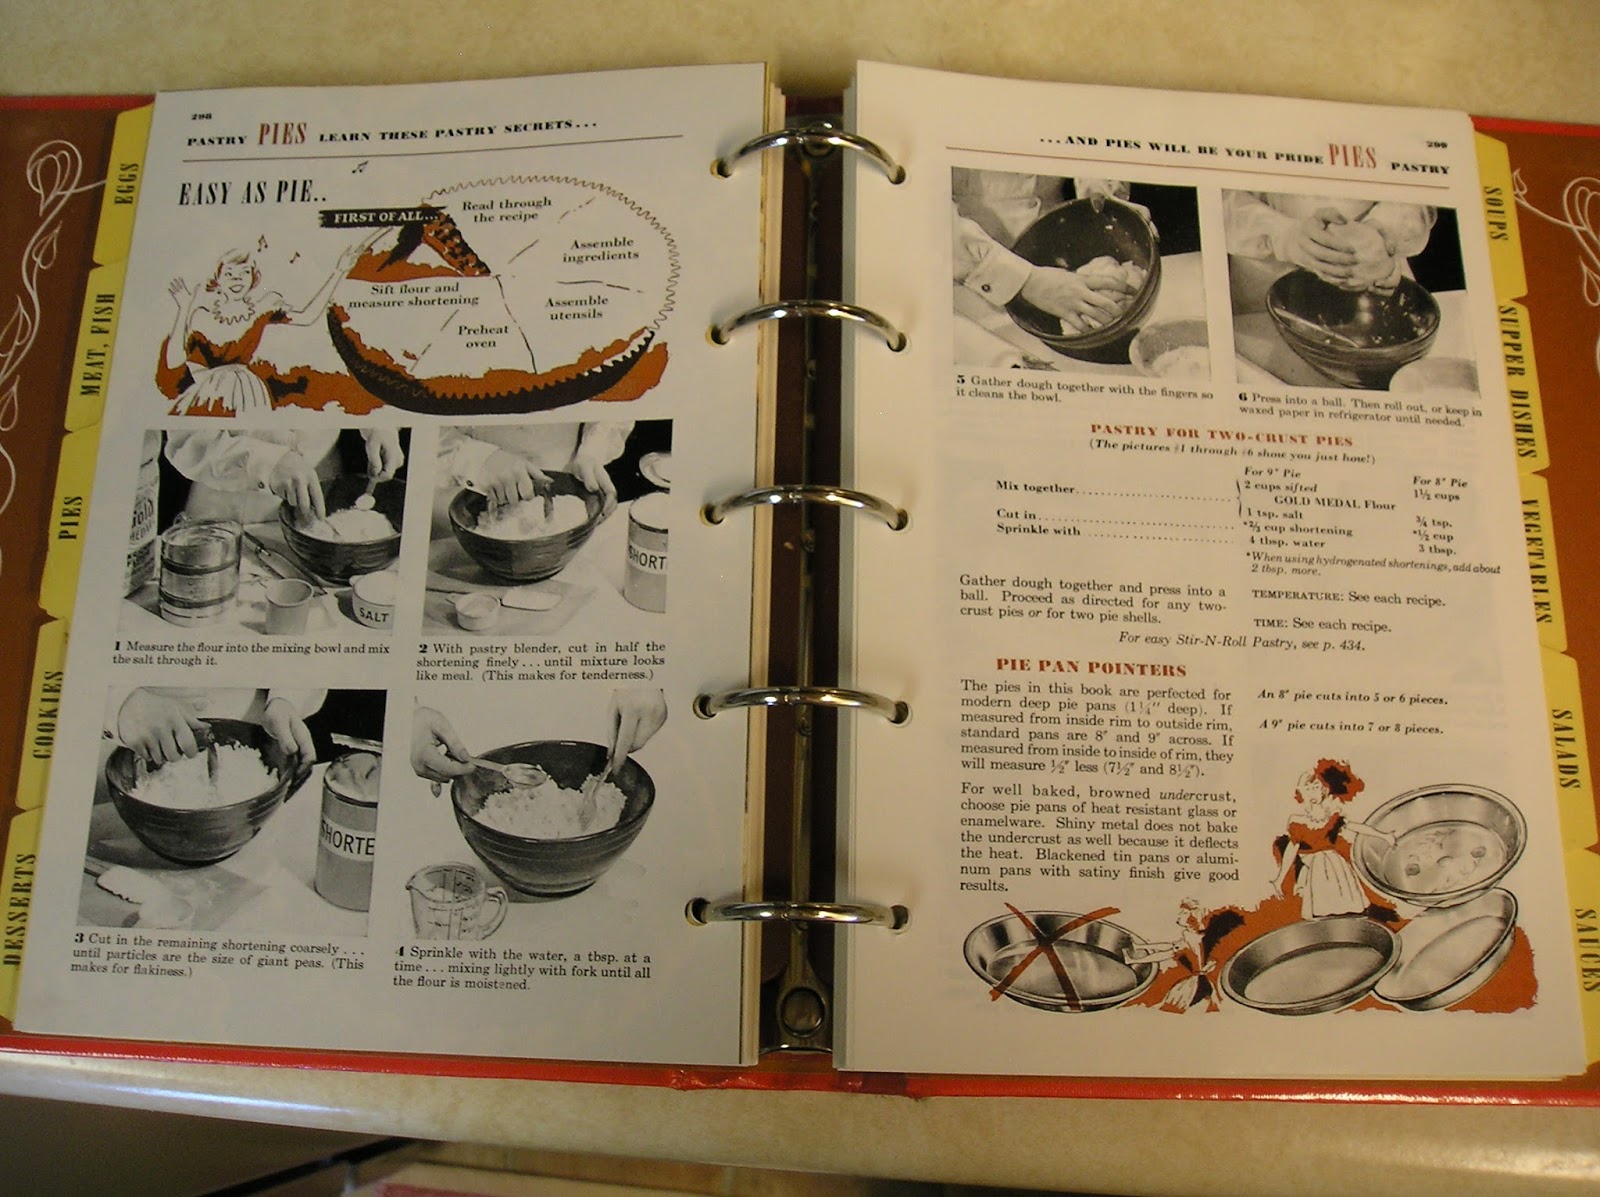
I have a new copy of the old Betty Crocker Cookbook with
pictures that has a good explanation of making a pie crust. This is
another one of those books we have an extra of in case someone may need
it.
 Boy! I sure know how to dirty up a kitchen! Frank spent his time between taking pictures and washing dishes.
The pie filling is very easy. If you have fresh squash, peel it, take the seeds out and cut it in cubes. Boil it until it is soft enough to mash easily with a potato masher. Measure out 2 1/2 cups and you are in business for making a pie.
Boy! I sure know how to dirty up a kitchen! Frank spent his time between taking pictures and washing dishes.
The pie filling is very easy. If you have fresh squash, peel it, take the seeds out and cut it in cubes. Boil it until it is soft enough to mash easily with a potato masher. Measure out 2 1/2 cups and you are in business for making a pie.
Grace and her husband have tried this pie and she says it is very similar to pumpkin pie. Frank and I don't care for traditional pumpkin pie, so I am not familiar with the ingredients. One of the things I like about this pie is the amount of our homegrown ingredients that go into it.
The recipe calls for 1/4 cup of cream, so I took out a couple of jars of milk and skimmed off some fresh cream.
I don't make our pies very sweet. I use 2/3 cup of brown sugar as the sweetener.
Add:
3 eggs
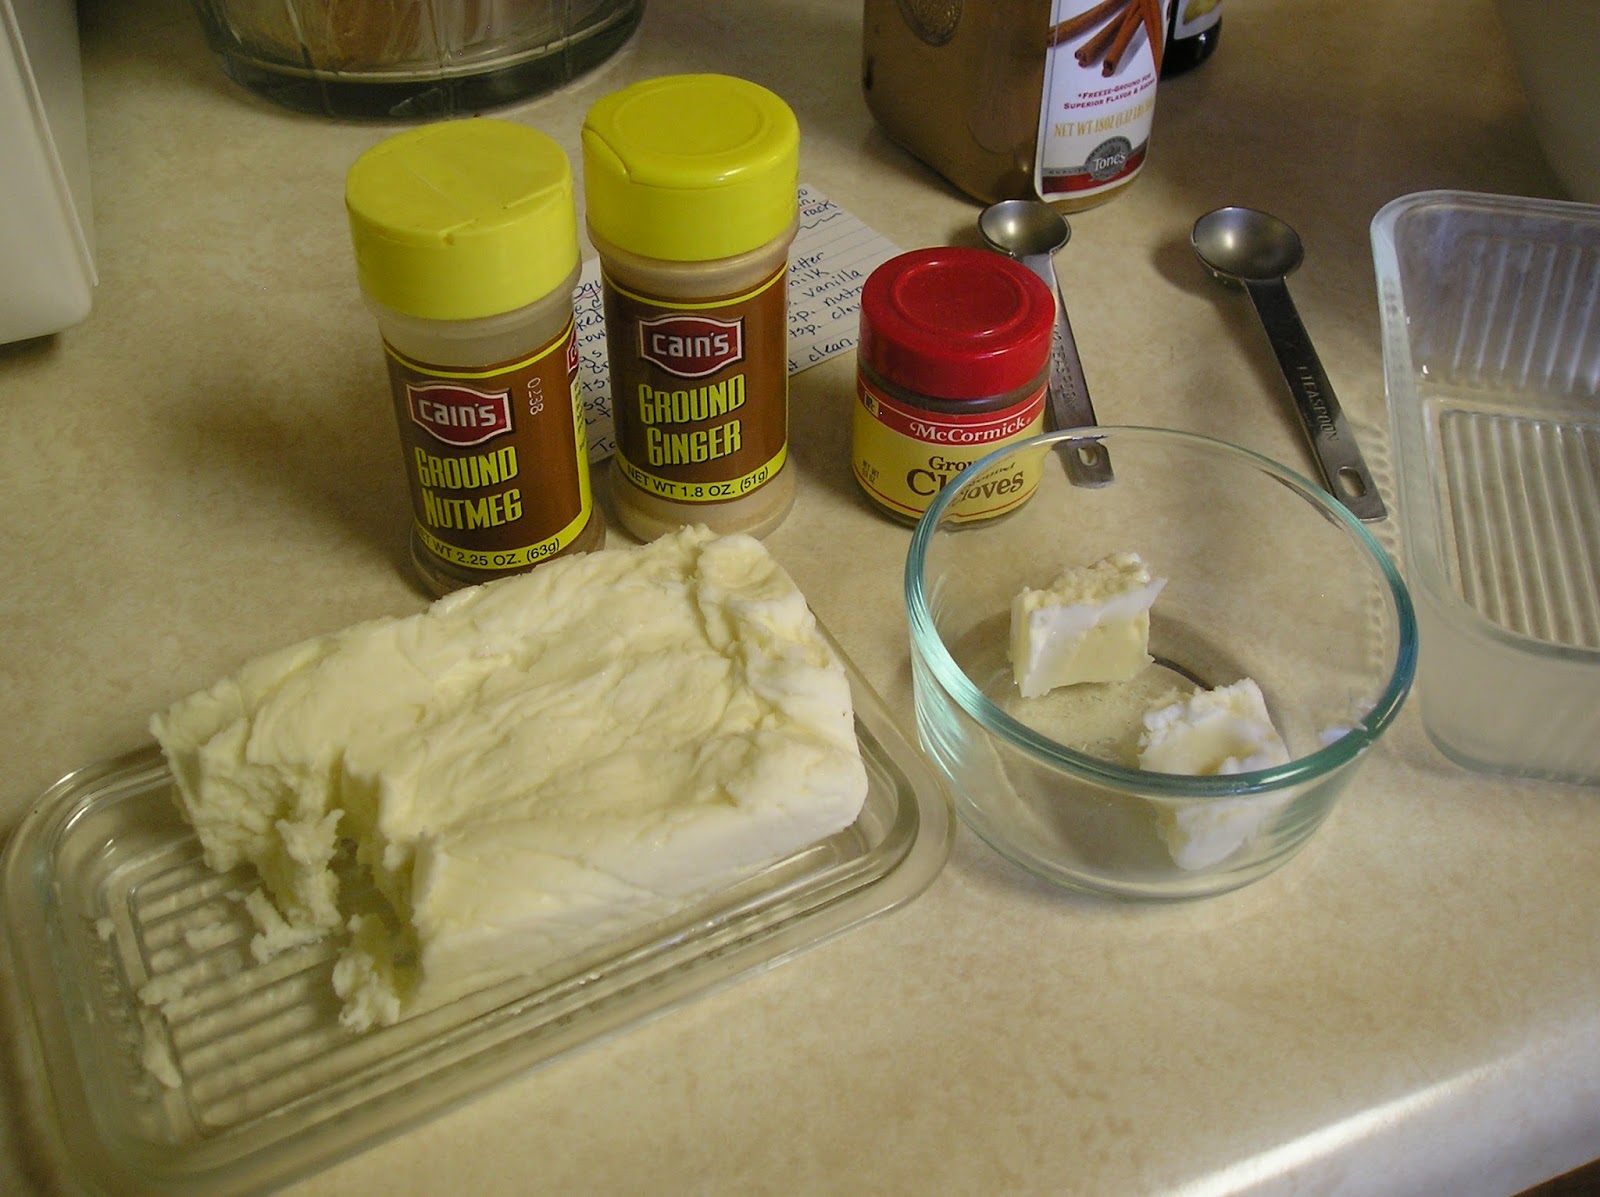 Melt and add
2 tbsp. butter
Melt and add
2 tbsp. butter
 1/2 cup milk
1/2 tsp. salt
1 tsp. cinnamon
1/2 tsp. ginger
1/2 tsp. nutmeg
1/4 tsp. cloves
1 tsp. vanilla
1/2 cup milk
1/2 tsp. salt
1 tsp. cinnamon
1/2 tsp. ginger
1/2 tsp. nutmeg
1/4 tsp. cloves
1 tsp. vanilla
 I made one of these once thinking I had mixed it up well. When I went to serve it I thought I had not mashed the squash up well enough when I found a lump. It was a cooked egg yolk! Make sure you mix your ingredients well.
Pour into the pie crust and bake at 375 degrees on the lowest rack in the oven for 50-60 minutes. A toothpick should come out clean. This is the only recipe I have ever used that has me cook on the bottom rack. I was surprised.
I made one of these once thinking I had mixed it up well. When I went to serve it I thought I had not mashed the squash up well enough when I found a lump. It was a cooked egg yolk! Make sure you mix your ingredients well.
Pour into the pie crust and bake at 375 degrees on the lowest rack in the oven for 50-60 minutes. A toothpick should come out clean. This is the only recipe I have ever used that has me cook on the bottom rack. I was surprised.
These Lodge trivets were a great find. We use them frequently when we are canning. Now it awaits the pie.
Frank was going to test the pie with his finger. I told him I wouldn't recommend that.
This is what our Winter Squash Pie looks like when you
serve it up before it is completely cooled. It kind of oozes onto the
plate but tastes great!
From the looks of our winter squash crop this summer, we hope to enjoy more pies in the months to come. This is another easy recipe with many homegrown ingredients that we really enjoy.
Until next time - Fern


 That is where I planted the cucumber seeds I saved last year. Only three of them germinated. All of the plants on the left are from a packet of seeds I bought.
 The planned yellow squash patch is between the tomato and green bean trellises. The grass and weeds are especially happy here.
 Some of the squash is happy, and some are heat stressed and need watering. I applied diatomaceous earth to all of the squash mounds in an effort to impact the vine borer and squash bug populations. I planted nasturtiums around the squash hills this year, which are very pretty flowers, and supposed to be bug deterrents.


 The green beans are growing well and blooming, but the heat is getting to them as well. Some of the bottom leaves are yellow today. There are carrots growing down each side of this trellis, in spite of all of the grass and weeds. I've been able to clear out parts of the weeds, but there are still more than enough to pull in this area.
 The Cushaw winter squash grows very well here. It took off early despite all of the rain and is producing a number of young squash. It is hardy and healthy.
 The cowpeas have more than enough grass to keep it company. Some of the seeds I replanted made it and some of them didn't. There are supposed to be two rows of okra growing in between the cowpeas, but the rain either washed away the seeds, or they rotted. I will be replanting them next week.


 The beets are doing well. There are some here and there in the cabbage patch as well as some back down by the collards and turnips. But there aren't enough, and I need to plant some more.