
Hi everybody. Today is Tuesday, the eggs have been in the incubator for two weeks and four days. Today I'm going to remove the automatic egg turner. There are some things to take into consideration when doing this. But, before we get into this, some things that have occurred since the last update.
.JPG)
The temperature of the eggs started to rise a little bit at the two week period. There is nothing unusual about the fluctuation in temperature, but they stayed a little bit high. So, I lowered the temperature a little bit. This particular incubator has an extremely sensitive thermostat. When I started the eggs originally, I started early in the morning so I would have all day to set the temperature. I did the same with this temperature adjustment, I did it in the morning.

I've also found that with this particular batch of eggs, I need to fill the water troughs up every two days. Don't ever let your water troughs go dry. Yes, there are much more sophisticated hydration systems. This is just the way this incubator operates.
The expected hatch date is Friday and Saturday, and maybe a few stragglers on Sunday. But, hatch or not, the unhatched eggs will be discarded Sunday night. We're getting close here, three days away. There are a few things I'm going to remind you about that you need to have. Some type of a brooder, feed, water and the equipment to deliver them, a source of heat in a draft free environment. It needs to be dog and cat proof. This applies whether you're hatching your own, or you've got chicks coming from a hatchery.

Now, back to removing the turner. Folks, this is the place where you want to pay attention. It's easy to shift your incubator when you do this. It's easy to drop an egg. I'm going to talk you through it right now. Follow me here. Always know where your cords are. There is a cord going to the incubator and a cord going to the turner. Do not be standing on one of them, no joke, I've done it more than once.

Remove the top portion of the incubator and set it down flat.

Before you remove the top, make sure the turner is in an almost flat position where there is no angle to the eggs. Read that last sentence again.
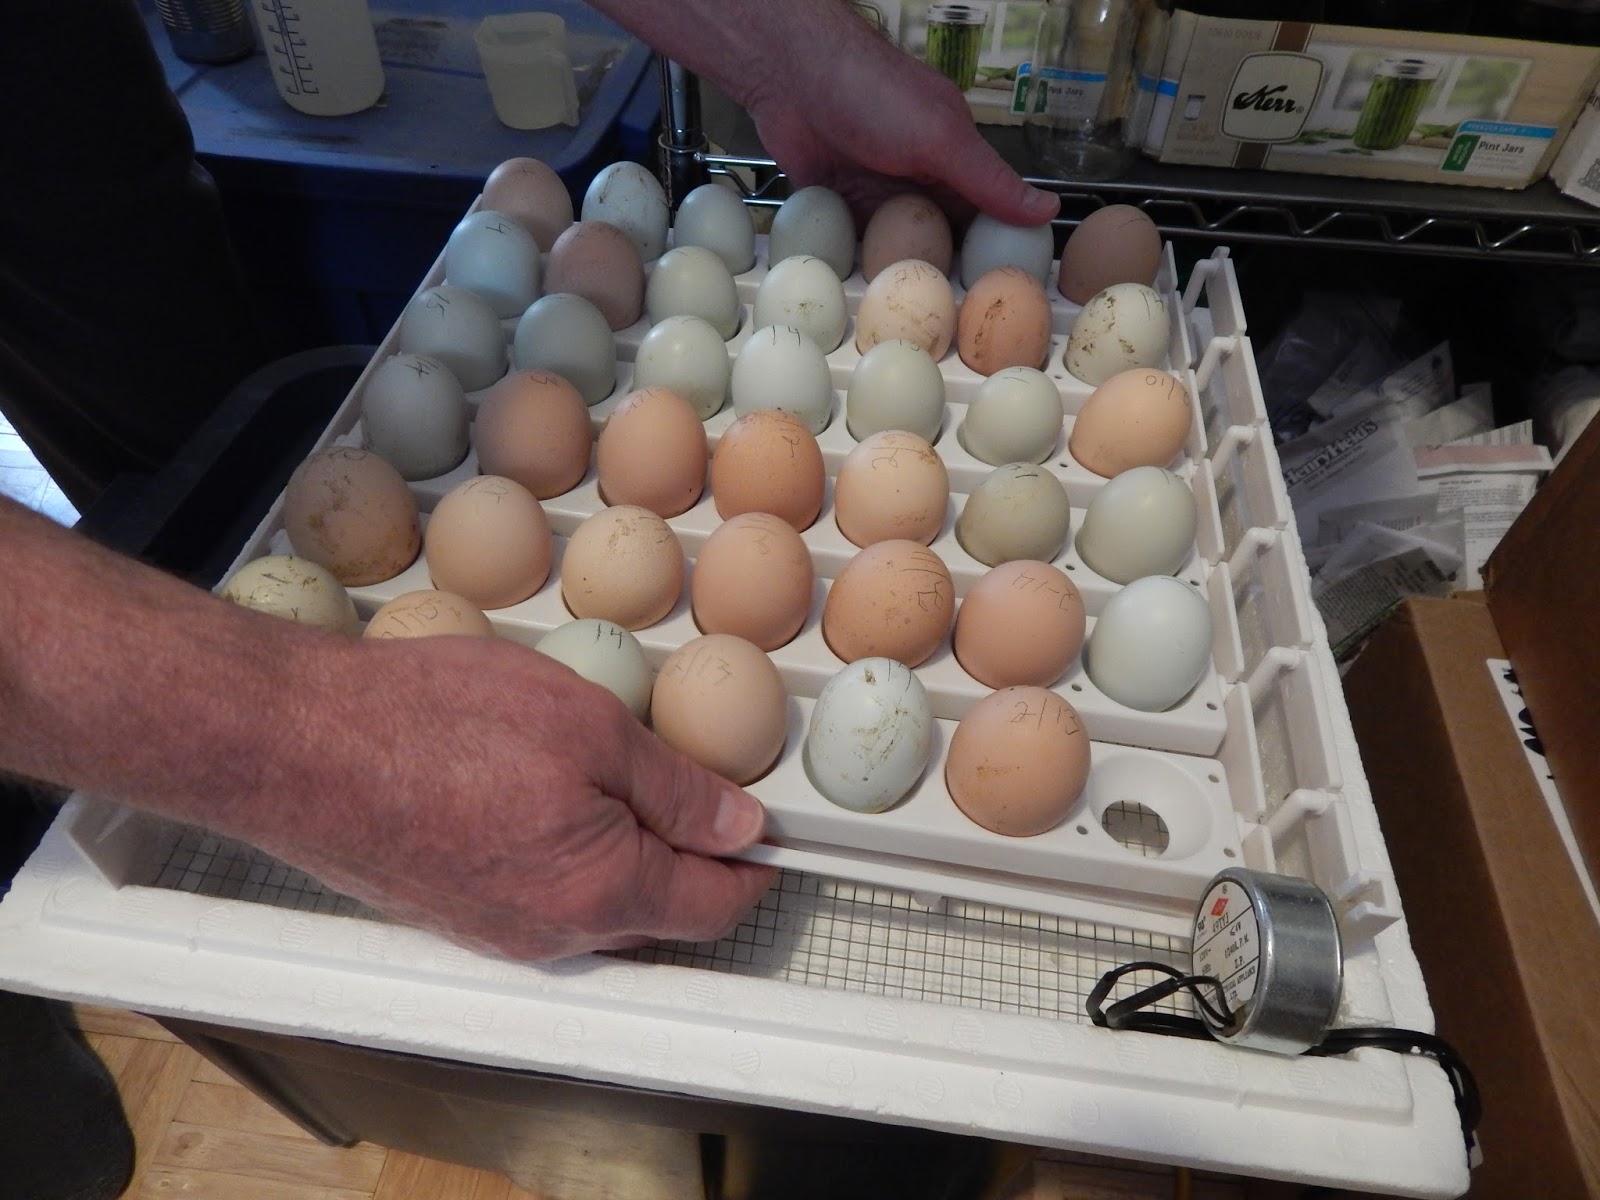

Okay, the top is off, you're not standing on one of the cords, very gently lift out the turner. Do not lift it by the egg trays, or you might find yourself holding an egg tray and the rest are on the floor. Set the turner down.

At this stage you should have unplugged the turner from the electrical outlet.


Now, all of your eggs are back in the incubator. You've got the water troughs filled up. It's three days to hatch. Put the top back on and make sure it's good and square and solid. Wait about an hour and check your temperature. Go ahead and put your turner back in the box that you saved. If it needs to be cleaned, and it probably won't, but if it does, just follow the instructions on how to clean them.

You are probably going to have to adjust your temperature up a little bit. The reason being, the turner motor produces heat, and it's not there now. And if you don't believe me, when you first take your turner out, reach down and grab that little motor. As my grandmother used to say, "I bet you won't do that again!" That little motor is hot.


The next three days, do not turn the eggs. Keep a very close eye on the temperature and humidity. If your incubator has a couple of plugs you can remove when your humidity increases, then remove the plugs. Because when these guys start hatching, you're going to have a sharp increase in moisture, which is not necessarily bad. But you want your baby chicks to dry also.
If you have one chick hatch real early, then just leave it in the incubator. It's not going anywhere. Start removing baby chicks from the incubator when you have five or six that are dry and ready to go. They're going to go in the brooder that you have ready and you're going to need to give them their first drink. If you need a review, now is a good time to read back because you still have a couple of days.
 |
| 2012 |
So, time is near. Watch your temperature. Enjoy the birds hatching out. Do not help them out of their shell, especially if it's getting to be late Sunday evening and a bird has almost hatched and it's been that way for the whole day. Then you need to discard that bird. There are people that would disagree with what I just said. But you need to discard that bird.

Okay. I've got baby chicks coming from the hatchery that should hatch about the same time as the ones I'm hatching at home. The eggs are hatching are from my Easter Egg chickens and from a friend of our that has an assortment of mixed breeds. My birds are going to hatch Friday and Saturday. About Thursday I will be tapping on the incubator and cheeping at the birds. Not clucking but cheeping. Cheeping is baby bird talk. Clucking is big bird talk. Hope you enjoy these little reminders.
We'll talk more later. Soon. Frank
It is suspenseful isn't it? I can hardly wait to see how your hatch goes!
ReplyDeleteHi Fiona,
DeleteI have done this many times and I'm still just as excited as the first time. I always have a fear that I got the eggs too hot or too cold and that none will hatch. Only once have I had a 100% hatch rate. Most of the time it's about 30 chicks out of 41 eggs. But on occasion I have had around 20 hatch. So, the official numbers will be in Sunday afternoon and I am excited as usual.
Frank
Love your interesting and detailed pictures! I have hatched chicks but had to turn them 4 times a day except no turning on the last day. I think a turner would be a great improvement. One thing we used that you might like to try was to place those wooden school rulers on the screen so the eggs would not roll and crack. They could wiggle but not roll into each other. Just a thought.
ReplyDeleteThanks!
K in OK <><
K,
DeleteThat's a great idea, but instead of wooden rulers, I will use plastic because that is what I have in storage in the 'little kid box'.
At first I didn't use a turner, but it does save work and time. Now that I'm home and retired, I may go back to just hand turning. More eggs in the incubator that way. It also gives you a chance to bond with the chicks early. (-:
Frank
There is such a science to this! Absolutely amazing. I'm afraid I take the easy way out and just let a mama hen do it.
ReplyDeleteLeigh,
DeleteWe have never been successful with letting the hen hatch her own eggs. And, we've only tried a couple of times. If the day comes we need to, I will certainly use that technique. I wish I just knew how.
Thank you for the comment.
Frank
For letting the hen do all the work, use a broody breed hen. I have always had good luck with a Black Australorpe. When your favorite hen goes broody, separate her from the other hens so you don't get a lazy hen laying eggs under your broody hen. If your rooster or roosters have been doing their job, you should have a set of fertilized eggs to put under your hen. Keep feed and water available for her. Let her out into the yard to exercise her legs (say morning and evening) for a short while. And don't worry about her, she has been to "brooding" school and knows what to do. She will deal with the temperature and turning for you. Just set the timer and wait your prescribed number of days. Oh! By the way, she doesn't mind if you slip her a couple of goose eggs or duck eggs or guinea eggs or..... She is racially blind and will hatch any fertilized egg you ask her to. My Australorpe hens have always been over dedicated. If there were unhatched eggs, they didn't want to give up. At some point, you have to step in and dispose of the dead eggs. She would literally stay on the eggs until she died, I think. There are many more broody breeds (and perfectly good ones). My experience though is with Black Australorpes. If it ain't broke, don't fix it! What the heck? What do you have to lose? A dozen eggs and a little time? Go for it! Get a broody breed hen and loan her a dozen eggs. She will amply repay you.
ReplyDeleteRalph, thank you, great comment. The primary reason I have never tried to let a hen hatch eggs, is that years ago we did try a couple of times but the hen would abandon the nest after about two weeks. Once, I took some of those eggs, brought them in the house and put them in a large stainless steel mixing bowl. But first, inside that mixing bowl, I put in a heating pad, a couple of towels, then the eggs, then put another towel on top. This hatched about five or six of those eggs. So, needless to say, we have never been successful.
DeleteWhen I order birds, I do take into consideration whether they are non-broody or will make good mothers. I think in the near future I will do a post about hatching eggs using a hen, ask a group of questions and hope for very constructive comments. This would not only benefit me, but hopefully some of the other readers.
Thanks again. Your comment is certainly appreciated.
Frank
Did anything hatch? Did the temperature get too high? Can't wait to hear about the EGGcitment! K in OK <><
ReplyDeleteYes, the hatch wasn't the best but they have arrived. The temperature didn't get too high, if anything it may have run just a bit cool. But they are here and doing well.
DeleteFern
The temperature should increase about midway in the hatch due to the little chicks beginning to create their own body heat. When that happens it's important to adjust the temp down so they don't overheat!
ReplyDeleteLooking forward to pics of the little ones! Thanks so much for sharing on The HomeAcre Hop!
Hi Lisa,
DeleteYes, they do produce their own heat during incubation. That's why it is important to keep a very close eye on the temperature throughout the process.
They are growing like weeds and fun to watch.
Thanks for coming by and leaving us a comment.
Fern