We don't make or eat a lot of sweets. Frank the carnivore, is more of a enchilada or potato chip kind of guy. When I need something sweet to take somewhere, Apple Cake is an easy recipe that is always a hit. One of the things that makes it quick and easy for me is the dehydrated apples I use. It will take a little longer if you choose to peel and chop fresh apples. One day, I hope to be able to use some of our own canned apples in this recipe. That would be really good also. This recipe is one of those keepers that has resided in my recipe box for years.
Since I am using dehydrated apples, the first thing I do is soak them in hot water, and start the oven preheating to 350 degrees.
While that is in the works, I mix up the remaining ingredients. When making sweets I always start with the eggs, sugar and whatever fat the recipe calls for, whether it is butter, oil or shortening. In this case, the recipe calls for:
2 eggs
3/4 c. oil (I use olive oil)
2 c. sugar (The original recipe recommends putting the sugar over the chopped apples and letting them sit while mixing up the rest of the batter. Since I have the dehydrated apples soaking at this point, I just add the sugar to the batter.)
I like to let these three ingredients mix for a few minutes until the mixture of eggs and sugar start to fluff up a bit. Then I start adding the rest of the ingredients, with the apples and nuts being the last things I add.
1 1/2 tsp. baking soda 1 tsp. salt
2 tsp. cinnamon
1/2 tsp. nutmeg
2 tsp. vanilla
1 1/2 cup chopped nuts (I use pecans.)
2 cups flour
4 cups thin sliced or chopped apples (if using dehydrated, drain before adding)
When you add the flour the batter will be very thick. Add the apples last. Mix long enough to get them coated well. The first time I did this I didn't think there was enough batter. It seems to barely coat the apples, but it comes out scrumptious, so don't worry about that.
That's it for the cake. Bake at 350 degrees for 45 minutes. The time frame is a rough estimate. Adjust it for your climate, altitude and
oven. A toothpick should come out clean when it is finished. A few things I have learned about this cake. Similar to banana bread, it is a very heavy cake. I tried to bake one of these in a bundt pan one time to take over to someone's house. I ran out of time and the middle never did get quite done. It works better in a standard 9 x 13 pan where the batter is not very thick, about 1 1/2" when you pour it in before baking. Otherwise, you will need to adjust your cooking times and make sure a toothpick comes out clean, so the center won't still be gooey.
1 tsp. salt
2 tsp. cinnamon
1/2 tsp. nutmeg
2 tsp. vanilla
1 1/2 cup chopped nuts (I use pecans.)
2 cups flour
4 cups thin sliced or chopped apples (if using dehydrated, drain before adding)
When you add the flour the batter will be very thick. Add the apples last. Mix long enough to get them coated well. The first time I did this I didn't think there was enough batter. It seems to barely coat the apples, but it comes out scrumptious, so don't worry about that.
That's it for the cake. Bake at 350 degrees for 45 minutes. The time frame is a rough estimate. Adjust it for your climate, altitude and
oven. A toothpick should come out clean when it is finished. A few things I have learned about this cake. Similar to banana bread, it is a very heavy cake. I tried to bake one of these in a bundt pan one time to take over to someone's house. I ran out of time and the middle never did get quite done. It works better in a standard 9 x 13 pan where the batter is not very thick, about 1 1/2" when you pour it in before baking. Otherwise, you will need to adjust your cooking times and make sure a toothpick comes out clean, so the center won't still be gooey.
 When the cake is almost done, cook your icing. This is the only icing I make like this. It calls for coconut, which is one of the few items I buy that doesn't fall into the basic foodstuffs category. And this is the only recipe I use it in. The original icing recipe calls for smaller amounts of each ingredient. I like a little more icing so it will soak down into the cake. That is part of the yum factor for me.
Start off by melting 6 tbsp. butter with 1/2 c. milk. To that add 3/4 to 1 cup brown sugar.
Let this cook for a bit until it starts to thicken up a little, then add 1 c. coconut and 1 cup of nuts, I use pecans for this also. Cook this for a few minutes until the nuts and coconut are coated, with some liquid left in the bottom of the pan when you stir it.
When the cake is almost done, cook your icing. This is the only icing I make like this. It calls for coconut, which is one of the few items I buy that doesn't fall into the basic foodstuffs category. And this is the only recipe I use it in. The original icing recipe calls for smaller amounts of each ingredient. I like a little more icing so it will soak down into the cake. That is part of the yum factor for me.
Start off by melting 6 tbsp. butter with 1/2 c. milk. To that add 3/4 to 1 cup brown sugar.
Let this cook for a bit until it starts to thicken up a little, then add 1 c. coconut and 1 cup of nuts, I use pecans for this also. Cook this for a few minutes until the nuts and coconut are coated, with some liquid left in the bottom of the pan when you stir it.
 All of my measurements for the icing are approximate. If there isn't enough liquid (butter, sugar and milk) left in the bottom of the pan after coating the nuts and coconut, I add a little more milk. This is what soaks into the cake. I have this hot and ready when the cake comes out of the oven.
As soon as the cake is done, pour the hot icing on top making sure to distribute the liquid around on the cake to soak in. Spread out the coconut and nuts evenly across the surface. There you have it.
This cake is okay warm, but we prefer it at room temperature after a few hours or over night. Anywhere you take this cake, it will be a hit. I don't remember where I ran across the original recipe. I know I have adjusted the cinnamon and nutmeg ratio to make it a little stronger to suit our tastes, so feel free to play with some of the ingredients until you get it just right for you and yours.
Today I made two cakes and put them in disposable foil pans to take to a local benefit. I have also made them in small 8 x 8 foil pans and frozen them to have on hand, just in case. It's that time of year when we start to think of the holidays and making good memories for our families and friends. In this time of changes in our world and society, it's good to be able to take some simple ingredients and make something that is comforting to those around us. Be careful, safe and healthy out there.
All of my measurements for the icing are approximate. If there isn't enough liquid (butter, sugar and milk) left in the bottom of the pan after coating the nuts and coconut, I add a little more milk. This is what soaks into the cake. I have this hot and ready when the cake comes out of the oven.
As soon as the cake is done, pour the hot icing on top making sure to distribute the liquid around on the cake to soak in. Spread out the coconut and nuts evenly across the surface. There you have it.
This cake is okay warm, but we prefer it at room temperature after a few hours or over night. Anywhere you take this cake, it will be a hit. I don't remember where I ran across the original recipe. I know I have adjusted the cinnamon and nutmeg ratio to make it a little stronger to suit our tastes, so feel free to play with some of the ingredients until you get it just right for you and yours.
Today I made two cakes and put them in disposable foil pans to take to a local benefit. I have also made them in small 8 x 8 foil pans and frozen them to have on hand, just in case. It's that time of year when we start to think of the holidays and making good memories for our families and friends. In this time of changes in our world and society, it's good to be able to take some simple ingredients and make something that is comforting to those around us. Be careful, safe and healthy out there.
Until next time - Fern
This is another very simple side dish that is easy to fix. The
ingredient list for this dish can be endless and easily tailored to what
you like and what you don't like. Even my carnivore, Frank, likes it, which is a miracle in itself. He even requests it on occasion.

As
I was making this salad and thinking of how I would describe it on here
I thought, "I really feel sorry for anyone that is a new wife or cook
and trying to follow my recipes." See, when I first got married I could
burn water. Really. Well, maybe not burn exactly, but I sure couldn't
cook very many things and it was just about impossible to get things to
come out ready to eat at the same time. We had to spend some time
eating one thing at a time so it didn't get cold while we were waiting
for everything else to be ready. So, for any newly married young folks
out there, I'm sorry. I know my measurements are usually nonexistent,
which can be really difficult. At least for someone like me. There are
still times when I ask someone how they made something and they kind of
describe it like I do - add a little of this and a little of that until
it tastes like you want it to. Unless I have tried something and kind
of know how it will taste, I need a recipe to follow, at least once. Then I've been known to change things around, sometimes rather drastically, to suit our tastes. This is one of those dishes.

Layer 1: This salad will be good with whatever greens you like to eat. I prefer a leaf lettuce. So first I cut it to bite size, well kinda. Put the greens in a bowl that is big enough for the quantity you want to fix. This will depend on how many people you are feeding. That is the nice thing about this salad. You can make it as large or as small as you need or want. It will be good for several days in the frig, so for us, leftovers are intended.
Layer 2: Celery, 1 or 2 stalks, chopped
Layer 3: Green onions, to taste, chopped (I used 5)
Layer 4: Frozen green peas (we have also used frozen mixed vegetables) I take these out and rinse them in cold water in a strainer to separate them before I start cutting up the lettuce.
Layer 5: Add any other vegetables you want. Sometimes we add bell pepper. I thought about rehydrating some of my dried peppers and putting them on here, but I forgot. Maybe next time.
 Layer 6: The dressing. I had a recipe for this once, but it has morphed into this. In a 2 cup measuring cup I put in about 1 cup of mayonnaise. I don't use Miracle Whip or anything like it, so I'm not sure how that flavor would work with this.
To the mayo I add about this much Ranch Dressing. If I had to guess, I would say about 2 or 3 tablespoons.
Next, I add some lemon juice. Again, if I were guessing, I'd say about 3 tablespoons. Mix well until smooth.
Pour this dressing out onto the salad.
Layer 6: The dressing. I had a recipe for this once, but it has morphed into this. In a 2 cup measuring cup I put in about 1 cup of mayonnaise. I don't use Miracle Whip or anything like it, so I'm not sure how that flavor would work with this.
To the mayo I add about this much Ranch Dressing. If I had to guess, I would say about 2 or 3 tablespoons.
Next, I add some lemon juice. Again, if I were guessing, I'd say about 3 tablespoons. Mix well until smooth.
Pour this dressing out onto the salad.
Then spread it out evenly and kind of seal off the salad.
 Layer 7: Shredded cheese, any kind you like. I used some of our cheddar.
Layer 8: Bacon bits. We like the 'real' ones that come in a bag from the warehouse market. Who knows what's been done to them for preservation, but they sure are convenient.
Layer 7: Shredded cheese, any kind you like. I used some of our cheddar.
Layer 8: Bacon bits. We like the 'real' ones that come in a bag from the warehouse market. Who knows what's been done to them for preservation, but they sure are convenient.
I have also been known to add a layer of boiled eggs and sunflower seeds. It also looks pretty in a glass bowl where you can see the layers. As you can see, it is a very versatile recipe. Yummy. Easy to fix. Great to eat.
This is especially good in the summer when it can be made with fresh ingredients from the garden. In the winter, we are blessed to have all of these ingredients at our finger tips at the store. It's easy to see why people just a few years ago were so hungry for the first fresh greens of spring after having gone without during the winter. One thing I would really like to be able to do is grow some fresh greens like spinach and lettuce during the winter. It's a goal I have that has not come to fruition yet. But it will. I will soon show you the beginning of my garden this year - I planted some seeds on December 29th. About this time of year I am ready for spring and gardening again. I'll let you see how it's going.

Really ponder what you can do to provide fresh food for your family year round without going to the store. We have grown alfalfa sprouts in a quart jar by the kitchen sink many times. They are easy and only take a few days before they are edible. It isn't our favorite thing to eat, but they are very healthy and easy to grow. This knowledge and supplies gives us one more layer of protection in the coming need for self-reliant food production. Try something new today that you haven't before and see how successful you can be. You're going to need it.
Until next time - Fern
We had one more bag of frozen winter squash left from last year's harvest that we wanted to eat, so that means it is time for a pie. Even with the incredible heat and drought we had last summer, our Cushaw and Buttercup squash did pretty good at
the end of the season. We kept many of them in storage for much of the winter, then we peeled, boiled and froze several quarts. This is our last quart. Since we didn't really plan ahead before we decided it was a good day for pie, we thawed it out in a sink of hot water while I made the pie crust.
I searched online for a recipe specific to Cushaw squash and found several that were almost what I wanted, so I combined the best of the ingredients and came up with this recipe. It calls for a single pie crust.
My pie crust recipe is the same one my mother taught me to use when I was in high school.
In my spare time as a teenager living in the country, I decided to type (on a manual typewriter!) my favorite recipes in a booklet format so I would have my own cookbook when I left home. Well, my booklet never really materialized, but I am still using my typewritten pages with my old favorite recipes.
To make the pie crust you need:
1 cup flour
1/2 tsp. salt
1/3 cup shortening
about 2 tbsp. water
First, dust 2 pieces of wax paper (about the size of your pie plate) with flour.
 Mix the salt with the flour, then cut in the shortening with a pastry blender until it is consistent and crumbly.
Sprinkle in a tablespoon of water at a time and stir with a fork until a ball forms. Use as little water as possible for a flakier crust.
Mix the salt with the flour, then cut in the shortening with a pastry blender until it is consistent and crumbly.
Sprinkle in a tablespoon of water at a time and stir with a fork until a ball forms. Use as little water as possible for a flakier crust.
 Put the ball of dough between the two pieces of waxed paper and flatten. Roll the dough out with a rolling pin a little larger than your pie plate. I have had this rolling pin for about 30 years. Frank made it in a woodshop class he taught. It was originally going to have handles like most traditional rolling pins, but never quite got that far. I am glad. I really like it just the way it is. I have tried one of the others and I don't think they work near as well. Maybe I am just a little biased, but for me, it is perfect.
 Slowly peel the top layer of waxed paper off. Don't be
surprised if the dough wants to stick to the paper somewhat. Just
gently get it started all across one side and peel back slowly.
Slowly peel the top layer of waxed paper off. Don't be
surprised if the dough wants to stick to the paper somewhat. Just
gently get it started all across one side and peel back slowly.

 Turn the dough over with the waxed paper side up and center it on the pie plate. Now repeat the same process of peeling off the final piece of waxed paper. Let the crust settle into the pie plate as you go.


 When my mom taught me how to make pie crust, the hardest part was learning to flute the edges, but I finally got it down. It isn't necessary, but it does make the pie look pretty. First, I tuck under the extra dough to give it an extra layer to flute. Then, squeeze the dough up between your fingers to form the scalloped looking edge.


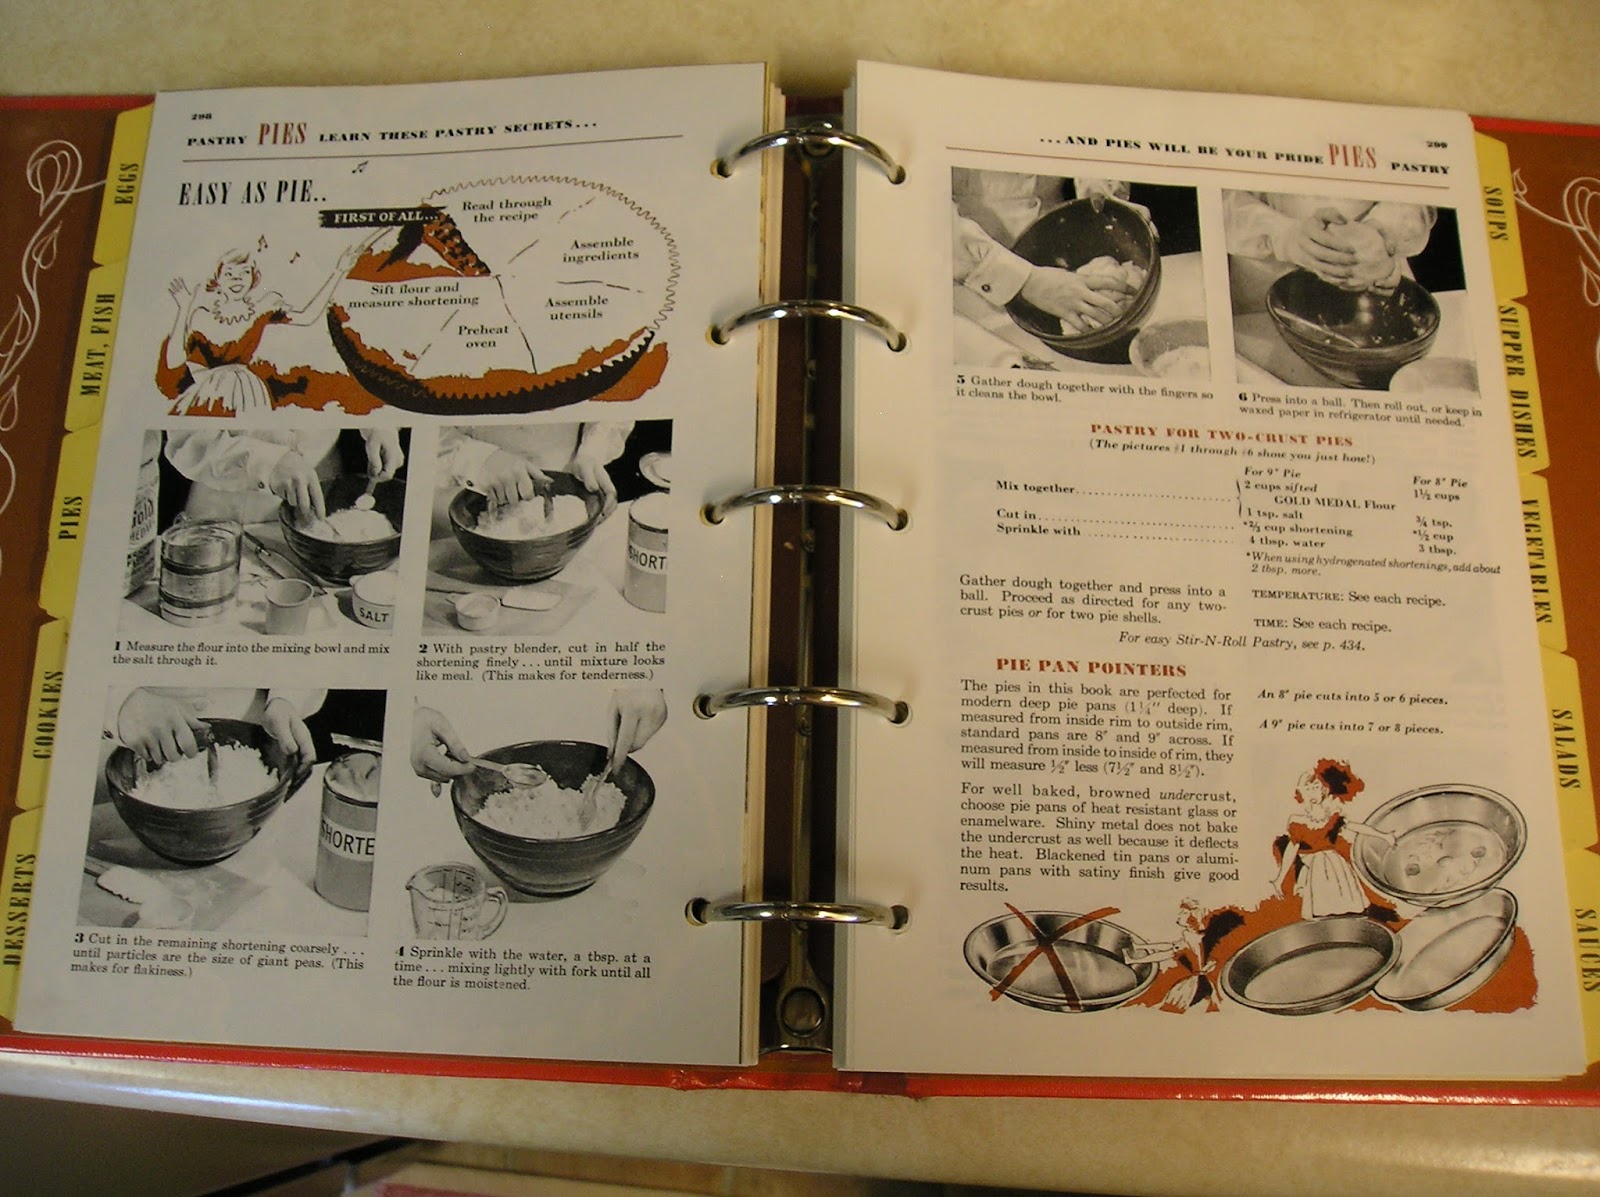
I have a new copy of the old Betty Crocker Cookbook with
pictures that has a good explanation of making a pie crust. This is
another one of those books we have an extra of in case someone may need
it.
 Boy! I sure know how to dirty up a kitchen! Frank spent his time between taking pictures and washing dishes.
The pie filling is very easy. If you have fresh squash, peel it, take the seeds out and cut it in cubes. Boil it until it is soft enough to mash easily with a potato masher. Measure out 2 1/2 cups and you are in business for making a pie.
Boy! I sure know how to dirty up a kitchen! Frank spent his time between taking pictures and washing dishes.
The pie filling is very easy. If you have fresh squash, peel it, take the seeds out and cut it in cubes. Boil it until it is soft enough to mash easily with a potato masher. Measure out 2 1/2 cups and you are in business for making a pie.
Grace and her husband have tried this pie and she says it is very similar to pumpkin pie. Frank and I don't care for traditional pumpkin pie, so I am not familiar with the ingredients. One of the things I like about this pie is the amount of our homegrown ingredients that go into it.
The recipe calls for 1/4 cup of cream, so I took out a couple of jars of milk and skimmed off some fresh cream.
I don't make our pies very sweet. I use 2/3 cup of brown sugar as the sweetener.
Add:
3 eggs
 Melt and add
2 tbsp. butter
Melt and add
2 tbsp. butter
 1/2 cup milk
1/2 tsp. salt
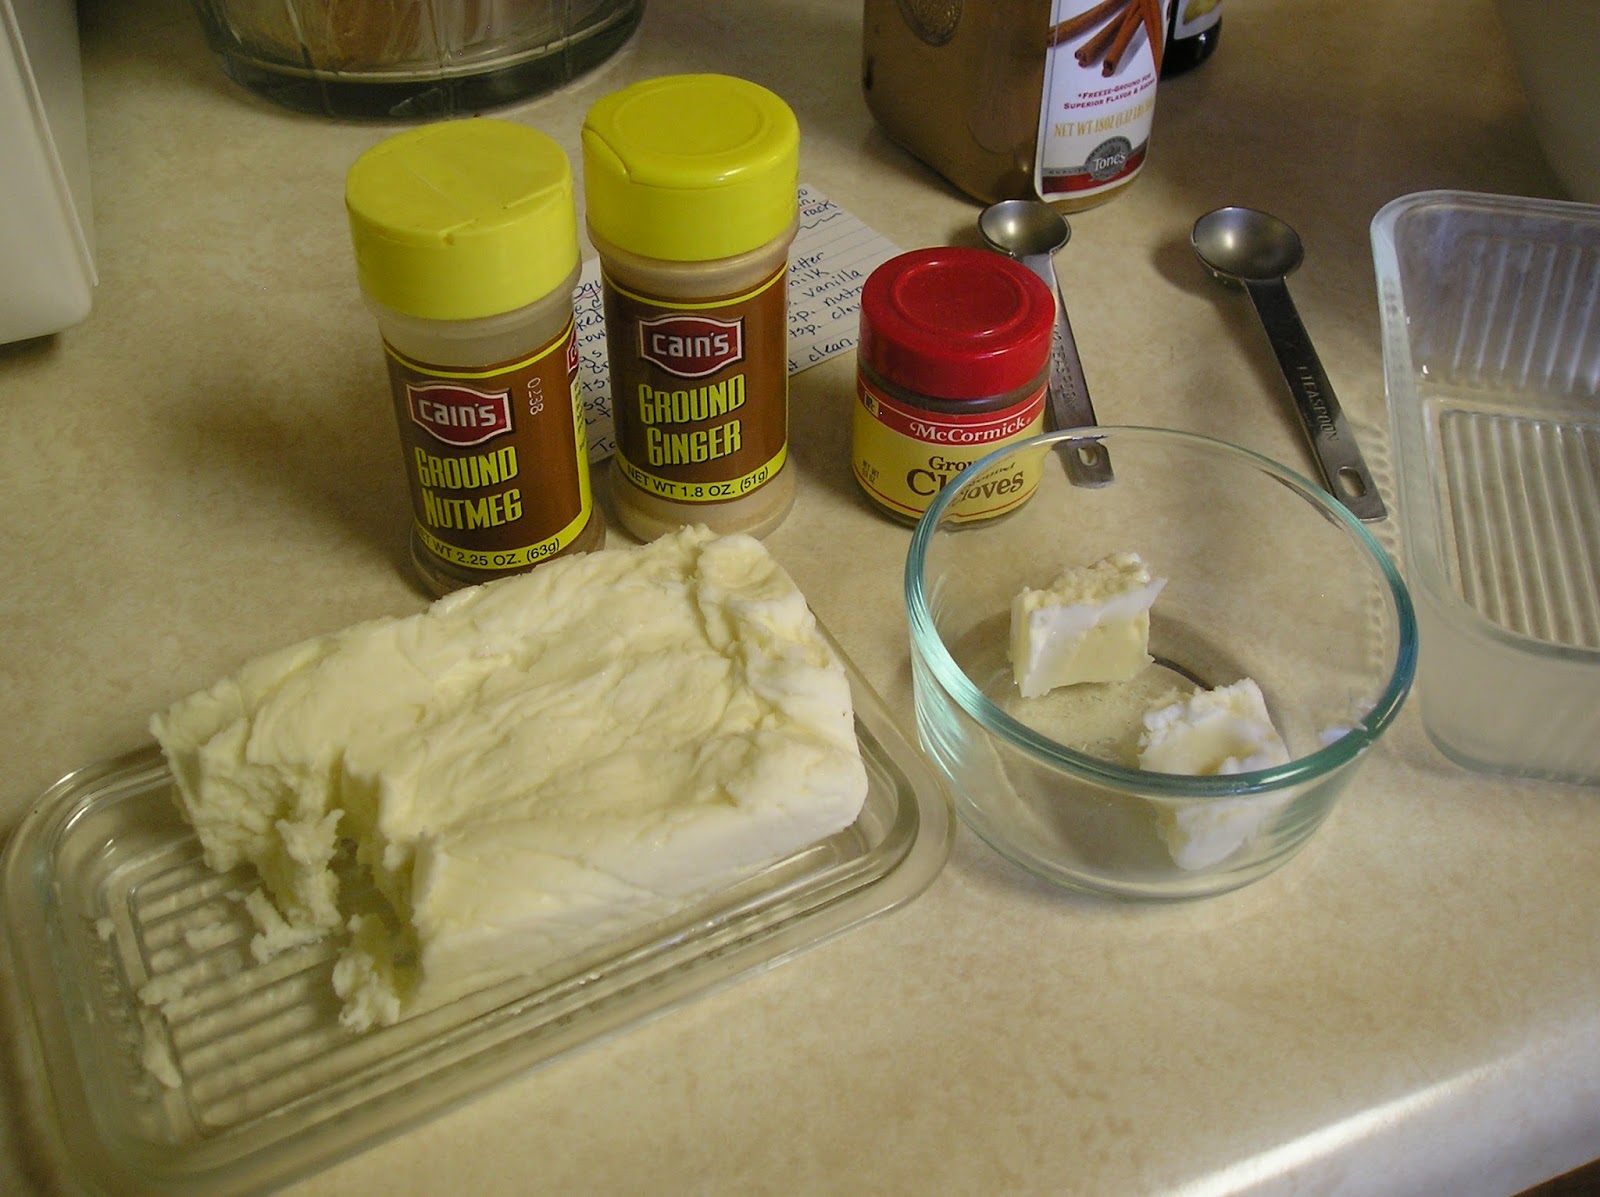
1 tsp. cinnamon
1/2 tsp. ginger
1/2 tsp. nutmeg
1/4 tsp. cloves
1 tsp. vanilla
1/2 cup milk
1/2 tsp. salt
1 tsp. cinnamon
1/2 tsp. ginger
1/2 tsp. nutmeg
1/4 tsp. cloves
1 tsp. vanilla
 I made one of these once thinking I had mixed it up well. When I went to serve it I thought I had not mashed the squash up well enough when I found a lump. It was a cooked egg yolk! Make sure you mix your ingredients well.
Pour into the pie crust and bake at 375 degrees on the lowest rack in the oven for 50-60 minutes. A toothpick should come out clean. This is the only recipe I have ever used that has me cook on the bottom rack. I was surprised.
I made one of these once thinking I had mixed it up well. When I went to serve it I thought I had not mashed the squash up well enough when I found a lump. It was a cooked egg yolk! Make sure you mix your ingredients well.
Pour into the pie crust and bake at 375 degrees on the lowest rack in the oven for 50-60 minutes. A toothpick should come out clean. This is the only recipe I have ever used that has me cook on the bottom rack. I was surprised.
These Lodge trivets were a great find. We use them frequently when we are canning. Now it awaits the pie.
Frank was going to test the pie with his finger. I told him I wouldn't recommend that.
This is what our Winter Squash Pie looks like when you
serve it up before it is completely cooled. It kind of oozes onto the
plate but tastes great!
From the looks of our winter squash crop this summer, we hope to enjoy more pies in the months to come. This is another easy recipe with many homegrown ingredients that we really enjoy.
Until next time - Fern